Until recently, I've used an OpenIndiana system to build the illumos packages that go into Tribblix. Clearly this is less than ideal - it would be nice to be able to build all of Tribblix on Tribblix.
This has always been a temporary expedient. So, here's how to build illumos-gate on Tribblix.
(Being able to do so is also good in that it increases the number of platforms on which a vanilla illumos-gate can be built.)
First, download and install Tribblix (version 0m10 or later). I recommend installing the kitchen-sink.
Then, if you're running 0m10, apply some necessary updates. As root:
zap refresh-overlays
zap refresh-catalog
zap update-overlay develop
zap uninstall TRIBdev-object-file
zap install TRIBdev-object-file
This won't be necessary in future releases, but I found some packaging issues which interfered with the illumos build (although other software doesn't bother), including some symlinks so that various utilities are where illumos-gate expects.
I run the build in a zone. It requires a non-standard environment, and using a zone means that I don't have to corrupt the global zone, and I can repeatably guarantee that I get a correct build environment.
Then, install a build zone. This will be a whole-root zone in which we copy the develop overlay from the global zone, and add the illumos-build overlay into the zone. (It will download the packages for the illumos-build overlay the first time you do this, but will cache them so if you repeat this later - and I tend to create build zones more or less at will - it won't have to). You need to specify a zone name and give it an IP address.
zap create-zone -t whole \
-z il-build -i 172.18.1.206 \
-o develop -O illumos-build
This will automatically boot the zone, you just have to wait until SMF has finished initialising.
Configure the zone so it can resolve names from DNS:
cp /etc/resolv.conf /export/zones/il-build/root/etc/
cp /etc/nsswitch.dns /export/zones/il-build/root/etc/nsswitch.conf
Go into the zone
zlogin il-build
In the zone, create a user to do the build, and a couple of hacky fixes
rm /usr/bin/cpp
cd /usr/bin ; ln -s ../gnu/bin/xgettext gxgettext
(The first is a bug in my gcc, the latter is a Makefile bug.)
If you want to build with SMB printing
zap install TRIBcups
Now, as the user, the build largely follows the normal instructions: you can use git to clone illumos-gate, unpack the closed bins, copy illumos.sh and nightly.sh, and edit illumos.sh to customize the build.
There are a few things you need to do to get a successful build. The first is to add the following to illumos.sh
export SUPPRESSPKGDEP=true
this is necessary as the IPS dependency step uses the installed image; as Tribblix uses SVR4 packaging, there isn't one. You can still create the IPS repo (and I do, as that's what I then turn into SVR4 packages), but the dependency step needs to be suppressed.
If you want to build with CUPS, then you'll need to have installed cups, and you'll need to patch smb. Alternatively, avoid pulling in CUPS by adding this to illumos.sh:
export ENABLE_SMB_PRINTING='#'
As Tribblix uses newer glib, the API has changed slightly and hal uses the old API. There is a proper fix, but you can simply:
gsed -i '/g_type_init/d' usr/src/cmd/hal/hald/hald.c
Note that this means that you won't be able to run the hal components on a system with a downrev glib.
Then you should be able to run a build:
time ./nightly.sh illumos.sh
The build should be clean (I see ELF runtime attribute warnings, all coming from glib and ffi, but those don't actually matter, and I'm not sure illumos should be complaining about errors in its external dependencies anyway).
Wednesday, May 21, 2014

Friday, May 16, 2014
Software verification of SVR4 packages with pkgchk
On Solaris (and Tribblix) you can use the pkgchk command to verify that the contents of a software package are correctly installed.
The simplest invocation is to give pkgchk the name of a package:
pkgchk SUNWcsl
I would expect SUNWcsl to normally validate cleanly. Whereas something like SUNWcsr will tend to produce lots of output as it contains lots of configuration files that get modified. (Use the -n flag to suppress most of the noise.
If you want to check individual files, then you can use
pkgchk -p /usr/bin/ls
or (and I implemented this as part of the OpenSolaris project) you can feed a list of files on stdin:
find /usr/bin -mtime -150 | pkgchk -i -
However, it turns out that there's a a snag with the basic usage of pkgchk to analyze a package, in that it will trust the contents file - both for the list of files in the package, and for their attributes.
Modifying the list of files can be a result of using installf and removef. For example, I delete some of the junk out of /usr/ucb (such as /usr/ucb/cc so as to be sure no poor unfortunate user can ever run it), and use removef to clean up the contents file. A side-effect of this is that pkgchk won't normally be able to detect that those files are missing.
Modifying file attributes can be the result of a second package installing the same pathname with different attributes. Having multiple packages deliver a directory is common, but you can also have multiple packages own a file. Whichever package was installed last gets to choose which attributes are correct, and the normal pkgchck is blind to any changes as a result.
There's a trick to get round this. From Solaris 10, the original package metadata (and unmodified copies of editable files) are kept. Each package has a directory in /var/sadm/pkg, and in each of those you'll find a save directory. This is used when installing zones, so you get a pristine copy. However, you can also use the pkgmap file to verify a package:
pkgchk -m /var/sadm/pkg/SUNWscpu/save/pspool/SUNWscpu/pkgmap
and this form of usage will detect files that have been removed or modified by tools that are smart enough to update the contents file.
(Because those save files are used by zones, you'll find they don't exist in a zone because they wouldn't be needed there. So this trick only works in a global zone, or you need to manually copy the pkgmap file.)
The simplest invocation is to give pkgchk the name of a package:
pkgchk SUNWcsl
I would expect SUNWcsl to normally validate cleanly. Whereas something like SUNWcsr will tend to produce lots of output as it contains lots of configuration files that get modified. (Use the -n flag to suppress most of the noise.
If you want to check individual files, then you can use
pkgchk -p /usr/bin/ls
or (and I implemented this as part of the OpenSolaris project) you can feed a list of files on stdin:
find /usr/bin -mtime -150 | pkgchk -i -
However, it turns out that there's a a snag with the basic usage of pkgchk to analyze a package, in that it will trust the contents file - both for the list of files in the package, and for their attributes.
Modifying the list of files can be a result of using installf and removef. For example, I delete some of the junk out of /usr/ucb (such as /usr/ucb/cc so as to be sure no poor unfortunate user can ever run it), and use removef to clean up the contents file. A side-effect of this is that pkgchk won't normally be able to detect that those files are missing.
Modifying file attributes can be the result of a second package installing the same pathname with different attributes. Having multiple packages deliver a directory is common, but you can also have multiple packages own a file. Whichever package was installed last gets to choose which attributes are correct, and the normal pkgchck is blind to any changes as a result.
There's a trick to get round this. From Solaris 10, the original package metadata (and unmodified copies of editable files) are kept. Each package has a directory in /var/sadm/pkg, and in each of those you'll find a save directory. This is used when installing zones, so you get a pristine copy. However, you can also use the pkgmap file to verify a package:
pkgchk -m /var/sadm/pkg/SUNWscpu/save/pspool/SUNWscpu/pkgmap
and this form of usage will detect files that have been removed or modified by tools that are smart enough to update the contents file.
(Because those save files are used by zones, you'll find they don't exist in a zone because they wouldn't be needed there. So this trick only works in a global zone, or you need to manually copy the pkgmap file.)
Tuesday, April 15, 2014
Partial root zones
In Tribblix, I support sparse-root and whole-root zones, which work largely the same way as in Solaris 10.
The implementation of zone creation is rather different. The original Solaris implementation extended packaging - so the packaging system, and every package, had to be zone-aware. This is clearly unsustainable. (Unfortunately, the same mistake was made when IPS was introduced.)
Apart from creating work, this approach limits flexibility - in order to innovate with zones, for example by adding new types, you have to extend the packaging system, and then modify every package in existence.
The approach taken by Tribblix is rather different. Instead of baking zone architecture into packaging, packaging is kept dumb and the zone creation scripts understand how packages are put together.
In particular, the decision as to whether a given file is present in a zone (and how it ends up there) is not based on package attributes, but is a simple pathname filter. For example, files under /kernel never end up in a zone. Files under /usr might be copied (for a whole-root zone) or loopback mounted (for a sparse-root zone). If it's under /var or /etc, you get a fresh copy. And so on. But the decision is based on pathname.
It's not just the files within packages that get copied. The package metadata is also copied; the contents file is simply filtered by pathname - and that's how the list of files to copy is generated. This filtering takes place during zone creation, and is all done by the zone scripts - the packaging tools aren't invoked (one reason why it's so quick). The scripts, if you want to look, are at /usr/lib/brand/*/pkgcreatezone.
In the traditional model, the list of installed packages in the zone is (initially) identical to that in the global zone. For a sparse-root zone, you're pretty much stuck with that. For a whole-root zone, you can add and remove packages later.
I've been working on some alternative models for zones in Tribblix that add more flexibility to zone creation. These will appear in upcoming releases, but I wanted to talk about the technology.
The first of these is what you might call a partial-root zone. This is similar to a whole-root zone in the sense that you get an independent copy, rather than being loopback mounted. And, it's using the same TRIBwhole brand. The difference is that you can specify a subset of the overlays present in the global zone to be installed in the zone. For example, you would use the following install invocation:
zoneadm -z myzone install -o developer
and only the developer overlay (and the overlays it depends on) will be installed in the zone.
This is still a copy - the installed files in the global zone are the source of the files that end up in the zone, so there's still no package installation, no need for repository access, and it's pretty quick.
This is still a filter, but you're now filtering both on pathname and package name.
As for package metadata, for partial-root zones, references to the packages that don't end up being used are removed.
That's the subset variant. The next obvious extension is to be able to specify additional packages (or, preferably, overlays) to be installed at zone creation time. That does require an additional source of packages - either a repository or a local cache - which is why I treat it as a logically distinct operation.
Time to get coding.
The implementation of zone creation is rather different. The original Solaris implementation extended packaging - so the packaging system, and every package, had to be zone-aware. This is clearly unsustainable. (Unfortunately, the same mistake was made when IPS was introduced.)
Apart from creating work, this approach limits flexibility - in order to innovate with zones, for example by adding new types, you have to extend the packaging system, and then modify every package in existence.
The approach taken by Tribblix is rather different. Instead of baking zone architecture into packaging, packaging is kept dumb and the zone creation scripts understand how packages are put together.
In particular, the decision as to whether a given file is present in a zone (and how it ends up there) is not based on package attributes, but is a simple pathname filter. For example, files under /kernel never end up in a zone. Files under /usr might be copied (for a whole-root zone) or loopback mounted (for a sparse-root zone). If it's under /var or /etc, you get a fresh copy. And so on. But the decision is based on pathname.
It's not just the files within packages that get copied. The package metadata is also copied; the contents file is simply filtered by pathname - and that's how the list of files to copy is generated. This filtering takes place during zone creation, and is all done by the zone scripts - the packaging tools aren't invoked (one reason why it's so quick). The scripts, if you want to look, are at /usr/lib/brand/*/pkgcreatezone.
In the traditional model, the list of installed packages in the zone is (initially) identical to that in the global zone. For a sparse-root zone, you're pretty much stuck with that. For a whole-root zone, you can add and remove packages later.
I've been working on some alternative models for zones in Tribblix that add more flexibility to zone creation. These will appear in upcoming releases, but I wanted to talk about the technology.
The first of these is what you might call a partial-root zone. This is similar to a whole-root zone in the sense that you get an independent copy, rather than being loopback mounted. And, it's using the same TRIBwhole brand. The difference is that you can specify a subset of the overlays present in the global zone to be installed in the zone. For example, you would use the following install invocation:
zoneadm -z myzone install -o developer
and only the developer overlay (and the overlays it depends on) will be installed in the zone.
This is still a copy - the installed files in the global zone are the source of the files that end up in the zone, so there's still no package installation, no need for repository access, and it's pretty quick.
This is still a filter, but you're now filtering both on pathname and package name.
As for package metadata, for partial-root zones, references to the packages that don't end up being used are removed.
That's the subset variant. The next obvious extension is to be able to specify additional packages (or, preferably, overlays) to be installed at zone creation time. That does require an additional source of packages - either a repository or a local cache - which is why I treat it as a logically distinct operation.
Time to get coding.
Sunday, April 13, 2014
Cloud analogies: Food As A Service
There's a recurring analogy of Cloud as utility, such as electrical power. I'm not convinced by this, and regard a comparison of the Cloud with the restaurant trade as more interesting. Read on...
Few IT departments build their own hardware, in the same way that few people grow their own food or keep their own livestock. Most buy from a supplier, in the same way that most buy food from a supermarket.
You could avoid cooking by eating out for every meal. Food as a Service, in current IT parlance.
The Cloud shares other properties with a restaurant. It operates on demand. It's self service, in the sense that anyone can walk in and order - you don't have to be a chef. There's a fixed menu of dishes, and portion sizes are fixed. It deals with wide fluctuations of usage throughout the day. For basic dishes, it can be more expensive than cooking at home. It's elastic, and scales, whereas most people would struggle if 100 visitors suddenly dropped by for dinner.
There's a wide choice of restaurants. And a wide variety of pricing models to match - Prix Fixe, a la carte, all you can eat.
Based on this analogy, the current infatuation with moving everything to the cloud would be the same as telling everybody that they shouldn't cook at home, but should always order in or eat out. You no longer need a kitchen, white goods, or utensils, nor do you need to retain any culinary skills.
Sure, some people do eat primarily at a basic burger bar. Some eat out all the time. Some have abandoned the kitchen. Is it appropriate for everyone?
Many people go out to eat not necessarily to avoid preparing their own food, but to eat dishes they cannot prepare at home, to try something new, or for special occasions.
In other words, while you can eat out for every meal, Food as a Service really comes into its own when it delivers capabilities beyond that of your own kitchen. Whether that be in the expertise of its staff, the tools in its kitchens, or the special ingredients that it can source, a restaurant can take your tastebuds places that your own kitchen can't.
As for the lunacy that is Private Cloud, that's really like setting up your own industrial kitchen and hiring your own chefs to run it.
Few IT departments build their own hardware, in the same way that few people grow their own food or keep their own livestock. Most buy from a supplier, in the same way that most buy food from a supermarket.
You could avoid cooking by eating out for every meal. Food as a Service, in current IT parlance.
The Cloud shares other properties with a restaurant. It operates on demand. It's self service, in the sense that anyone can walk in and order - you don't have to be a chef. There's a fixed menu of dishes, and portion sizes are fixed. It deals with wide fluctuations of usage throughout the day. For basic dishes, it can be more expensive than cooking at home. It's elastic, and scales, whereas most people would struggle if 100 visitors suddenly dropped by for dinner.
There's a wide choice of restaurants. And a wide variety of pricing models to match - Prix Fixe, a la carte, all you can eat.
Based on this analogy, the current infatuation with moving everything to the cloud would be the same as telling everybody that they shouldn't cook at home, but should always order in or eat out. You no longer need a kitchen, white goods, or utensils, nor do you need to retain any culinary skills.
Sure, some people do eat primarily at a basic burger bar. Some eat out all the time. Some have abandoned the kitchen. Is it appropriate for everyone?
Many people go out to eat not necessarily to avoid preparing their own food, but to eat dishes they cannot prepare at home, to try something new, or for special occasions.
In other words, while you can eat out for every meal, Food as a Service really comes into its own when it delivers capabilities beyond that of your own kitchen. Whether that be in the expertise of its staff, the tools in its kitchens, or the special ingredients that it can source, a restaurant can take your tastebuds places that your own kitchen can't.
As for the lunacy that is Private Cloud, that's really like setting up your own industrial kitchen and hiring your own chefs to run it.
Wednesday, April 02, 2014
Slimming down logstash
Following on from my previous post on logstash, it rapidly becomes clear that the elasticsearch indices grow rather large.
After a very quick look, it was obvious that some of the fields I was keeping were redundant or unnecessary.
For example, why keep the pathname of the log file itself? It doesn't change over time, and you can work out the name of the file easily (if you ever wanted it, and I can't see why you ever would - if you wanted to identify a source, that ought to be some other piece of data you create).
Also, why keep the full log message? You've parsed it, broken it up, and stored the individual fields you're interested in. So why keep the whole thing, a duplicate of the information you're already storing?
With that in mind, I used a mutate clause to remove the file name and the original log entry, like so:
mutate {
remove_field => "path"
remove_field => "message"
}
After this simple change, the daily elasticsearch indices on the first system I tried this on shrank from 4.5GB to 1.6GB - almost a factor of 3. Definitely worthwhile, and there are benefits in terms of network traffic, search performance, elasticsearch memory utilization, and capacity for future growth as well.
After a very quick look, it was obvious that some of the fields I was keeping were redundant or unnecessary.
For example, why keep the pathname of the log file itself? It doesn't change over time, and you can work out the name of the file easily (if you ever wanted it, and I can't see why you ever would - if you wanted to identify a source, that ought to be some other piece of data you create).
Also, why keep the full log message? You've parsed it, broken it up, and stored the individual fields you're interested in. So why keep the whole thing, a duplicate of the information you're already storing?
With that in mind, I used a mutate clause to remove the file name and the original log entry, like so:
mutate {
remove_field => "path"
remove_field => "message"
}
After this simple change, the daily elasticsearch indices on the first system I tried this on shrank from 4.5GB to 1.6GB - almost a factor of 3. Definitely worthwhile, and there are benefits in terms of network traffic, search performance, elasticsearch memory utilization, and capacity for future growth as well.
Saturday, February 08, 2014
Zone logs and logstash
Today I was playing with logstash, with the plan to produce a real-time scrolling view of our web traffic.
It's easy enough. Run a logstash shipper on each node, feed everything into redis, get logstash to pull from redis into elasticsearch, then run the logstash front-end and use Kibana to create a dashboard.
Then the desire for efficiency strikes. We're running Solaris zones, and there are a lot of them. Each logstash instance takes a fair chunk of memory, so it seems like a waste to run one in each zone.
So what I wanted to do was run a single copy of logstash in the global zone, and get it to read all the zone logs, yet present the data just as though it had been run in the zone.
The first step was to define which logs to read. The file input can take wildcards, leading to a simple pattern:
input {
file {
type => "apache"
path => "/storage/*/opt/proquest/*/apache/logs/access_log"
}
}
There's a ZFS pool storage, each zone has a zfs file system named after the zone. So the name of the zone is the directory under /storage. So I can pick out the name of the zone and put it into a variable called zonename like so:
grok {
type => "apache"
match => ["path","/storage/%{USERNAME:zonename}/%{GREEDYDATA}"]
}
(If it looks odd to use the USERNAME pattern, the naming rules for our zones happen to be the same as for user names, so I use an existing pattern rather than define a new one.)
I then want the host entry associated with this log to be that of the zone, rather than the default of the global zone. So I mutate the host entry:
mutate {
type => "apache"
replace => [ "host","%{zonename}.our.company.name" ]
}
And that's pretty much it. It's very simple, but most of the documentation I could find was incorrect in the sense that it applied to old versions of logstash.
There were a couple of extra pieces of information that I then found it useful to add. The simplest was to duplicate the original host entry into a servername, so I can aggregate all the traffic associated with a physical host. The second was to pick out the website name from the zone name (in this case, the zone name is the short name of the website, with a suffix appended to distinguish the individual zones).
grok {
type => "apache"
match => ["zonename","%{WORD:sitename}-%{GREEDYDATA}"]
}
Then sitename contains the short name of the site, again allowing me to aggregate the statistics from all the zones that serve that site.
It's easy enough. Run a logstash shipper on each node, feed everything into redis, get logstash to pull from redis into elasticsearch, then run the logstash front-end and use Kibana to create a dashboard.
Then the desire for efficiency strikes. We're running Solaris zones, and there are a lot of them. Each logstash instance takes a fair chunk of memory, so it seems like a waste to run one in each zone.
So what I wanted to do was run a single copy of logstash in the global zone, and get it to read all the zone logs, yet present the data just as though it had been run in the zone.
The first step was to define which logs to read. The file input can take wildcards, leading to a simple pattern:
input {
file {
type => "apache"
path => "/storage/*/opt/proquest/*/apache/logs/access_log"
}
}
There's a ZFS pool storage, each zone has a zfs file system named after the zone. So the name of the zone is the directory under /storage. So I can pick out the name of the zone and put it into a variable called zonename like so:
grok {
type => "apache"
match => ["path","/storage/%{USERNAME:zonename}/%{GREEDYDATA}"]
}
(If it looks odd to use the USERNAME pattern, the naming rules for our zones happen to be the same as for user names, so I use an existing pattern rather than define a new one.)
I then want the host entry associated with this log to be that of the zone, rather than the default of the global zone. So I mutate the host entry:
mutate {
type => "apache"
replace => [ "host","%{zonename}.our.company.name" ]
}
And that's pretty much it. It's very simple, but most of the documentation I could find was incorrect in the sense that it applied to old versions of logstash.
There were a couple of extra pieces of information that I then found it useful to add. The simplest was to duplicate the original host entry into a servername, so I can aggregate all the traffic associated with a physical host. The second was to pick out the website name from the zone name (in this case, the zone name is the short name of the website, with a suffix appended to distinguish the individual zones).
grok {
type => "apache"
match => ["zonename","%{WORD:sitename}-%{GREEDYDATA}"]
}
Then sitename contains the short name of the site, again allowing me to aggregate the statistics from all the zones that serve that site.
Friday, November 29, 2013
Tribblix - making PXE boot work
One of the key changes in the latest milestone of Tribblix is the ability to bot and install a system over the network, using PXE. I've covered how to set this up elsewhere, but here I'll talk a little about how this is implemented under the covers.
Essentially, the ISO image has 3 pieces.
When you boot via PXE, you can't blindly search everywhere in the network for the location of solaris.zlib, so the required location is set as a boot argument in menu.lst, and the system extracts the required value from the boot arguments.
What it will get back is a URL of a server, so it appends solaris.zlib to that and retrieves it using wget. The file is saved to a known location and then lofi mounted. Then boot proceeds as normal.
Note that you can use any dhcp/tftp server for the PXE part, and any http server. There's no requirement on the server side for a given platform, configuration, or software. (And it doesn't even have to be http, as long as it's a protocol built into wget.)
It's actually very simple. There are, of course, a few wrinkles along the way.
The final piece of the ISO image is the additional packages. If you tell the system nothing, it will go off to the main repositories to download any packages. (Please, don't do this. I'm not really set up to deliver that much traffic.) But you can copy the pkgs directory from the iso image and specify that location as a boot argument so the installer knows where the packages are. What it actually does underneath is set that location up as the primary repository temporarily during the install.
The present release doesn't have automation - booting via PXE is just like booting from CD, and you have to run the install interactively. But all the machinery is now in place to build a fully automated install mechanism (think like jumpstart, although it'll achieve the same goals via completely different means).
One final note. Unlike the OpenSolaris/Solaris 11/OpenIndiana releases which have separate images for server, desktop, and network install, Tribblix has a single image that does all 3 in one. The ability to define installed packages eliminates the need for separate desktop (live) and server (text) images, and the PXE implementation described here means you can take the regular iso and use that for network booting.
Essentially, the ISO image has 3 pieces.
- The platform directory contains the kernel, and the boot archive. This is what's loaded at boot.
- The file solaris.zlib is a lofi compressed file containing an image of the /usr filesystem.
- The pkgs directory contains additional SVR4 packages that can be installed.
When you boot via PXE, you can't blindly search everywhere in the network for the location of solaris.zlib, so the required location is set as a boot argument in menu.lst, and the system extracts the required value from the boot arguments.
What it will get back is a URL of a server, so it appends solaris.zlib to that and retrieves it using wget. The file is saved to a known location and then lofi mounted. Then boot proceeds as normal.
Note that you can use any dhcp/tftp server for the PXE part, and any http server. There's no requirement on the server side for a given platform, configuration, or software. (And it doesn't even have to be http, as long as it's a protocol built into wget.)
It's actually very simple. There are, of course, a few wrinkles along the way.
- There are some files in /usr that are needed to mount /usr, so the boot archive contains a minimally populated copy of /usr that allows you to bootstrap the system until you mount the real /usr over the top of it
- For PXE boot, you need more such files in the boot archive than you do for booting from CD. In particular, I had to add prtconf (used in parsing boot arguments) and wget (to do the retrieve over http)
- I add wget rather than curl, as the wget package is much smaller than the curl package, even though I had previously standardised on curl for package installation
- Memory requirements are a little higher than for a CD boot, as the whole of solaris.zlib is copied into memory. However, because it's in memory, the system is really fast
The final piece of the ISO image is the additional packages. If you tell the system nothing, it will go off to the main repositories to download any packages. (Please, don't do this. I'm not really set up to deliver that much traffic.) But you can copy the pkgs directory from the iso image and specify that location as a boot argument so the installer knows where the packages are. What it actually does underneath is set that location up as the primary repository temporarily during the install.
The present release doesn't have automation - booting via PXE is just like booting from CD, and you have to run the install interactively. But all the machinery is now in place to build a fully automated install mechanism (think like jumpstart, although it'll achieve the same goals via completely different means).
One final note. Unlike the OpenSolaris/Solaris 11/OpenIndiana releases which have separate images for server, desktop, and network install, Tribblix has a single image that does all 3 in one. The ability to define installed packages eliminates the need for separate desktop (live) and server (text) images, and the PXE implementation described here means you can take the regular iso and use that for network booting.
Tribblix - getting boot arguments
This explains how I handled boot arguments for Tribblix, but it's generally true for all illumos and similar distributions. This is necessary for things like PXE boot and network installation, where you need to be able to tell the system critical information without baking it into the source.
And this particular mechanism described here is for x86 only. It's unfortunate that the boot mechanism is architecture specific.
Anyway, back to boot arguments. Using grub, you use the menu.lst file to determine how the system boots. In particular, the kernel$ line specifies which kernel to boot, and you can pass boot arguments. For example, it might say
kernel$ /platform/i86pc/kernel/$ISADIR/unix -B console=ttya
and, in this case, what comes after -B is the boot arguments. This is a list of key=value pairs, comma separated.
Another example, from my implementation of PXE boot,might be:
-B install_pkgs=http://172.18.1.7:8080/pkgs/0m8/pkgs/
So that's how they're defined, and you can really define anything you like. It's up to the system to interpret them as it sees fit.
When the system boots, how do you access these parameters? They're present in the system configuration as displayed by prtconf. In particular
prtconf -v /devices
gets you the information you want - containing a bunch of standard information and the boot arguments. Try this on a running system, and you'll see things like what program actually got booted:
name='bootprog' type=string items=1
value='/platform/i86pc/multiboot'
So, all you have to do to find the value of a boot argument is look through the prtconf output for the name of the boot argument you're after, and then pick the value off the next line. Going back to my example earlier, we just look for install_pkgs and get the value. This little snippet does the job:
(Breaking this down, sed -n outputs nothing by default, looks for the pattern in /install_pkgs/, then the {;n;p;} skips to the next line and prints it, then cut grabs the second word, split by the quote. Ugly as heck.)
At this point, you can test whether the argument was defined, and use it in your scripts.
And this particular mechanism described here is for x86 only. It's unfortunate that the boot mechanism is architecture specific.
Anyway, back to boot arguments. Using grub, you use the menu.lst file to determine how the system boots. In particular, the kernel$ line specifies which kernel to boot, and you can pass boot arguments. For example, it might say
kernel$ /platform/i86pc/kernel/$ISADIR/unix -B console=ttya
and, in this case, what comes after -B is the boot arguments. This is a list of key=value pairs, comma separated.
Another example, from my implementation of PXE boot,might be:
-B install_pkgs=http://172.18.1.7:8080/pkgs/0m8/pkgs/
So that's how they're defined, and you can really define anything you like. It's up to the system to interpret them as it sees fit.
When the system boots, how do you access these parameters? They're present in the system configuration as displayed by prtconf. In particular
prtconf -v /devices
gets you the information you want - containing a bunch of standard information and the boot arguments. Try this on a running system, and you'll see things like what program actually got booted:
name='bootprog' type=string items=1
value='/platform/i86pc/multiboot'
So, all you have to do to find the value of a boot argument is look through the prtconf output for the name of the boot argument you're after, and then pick the value off the next line. Going back to my example earlier, we just look for install_pkgs and get the value. This little snippet does the job:
PKGMEDIA=`/usr/sbin/prtconf -v /devices | \
    /usr/bin/sed -n '/install_pkgs/{;n;p;}' | \
    /usr/bin/cut -f 2 -d \'`
(Breaking this down, sed -n outputs nothing by default, looks for the pattern in /install_pkgs/, then the {;n;p;} skips to the next line and prints it, then cut grabs the second word, split by the quote. Ugly as heck.)
At this point, you can test whether the argument was defined, and use it in your scripts.
Friday, June 14, 2013
Do we hate our users?
As part of my job, I get to deal with all sorts of oddball systems and setups. Whether this is something we've inherited through acquisition, trying to resurrect or repair some antique legacy system, or needing to make some strange application nobody has ever heard of, it tends to veer in my direction.
As a result, I've had the misfortune to use and fix a wide variety of systems and applications, obviously all built by someone else.
Based on this, I can only come to one conclusion: most Unix Adminstrators hate their users, and do everything they can to make their lives miserable.
That's a pretty grim statement, and I'm hoping that most of the people reading here won't fall into that category. But here's just one example today:
I have to migrate an application, so was given a login to the system so I could check it out. What interactive shell do I get? They've given me, and most users by the looks of it, /bin/sh, on a Solaris 8 box.
Sheesh. I've been using an interactive shell that supports command line recall and editing, not to mention completion and spell-checking, since the 1980s. There is absolutely no excuse in the 21st century not to give users a decent shell. If it's not deliberate hatred of your users, then it's either laziness or incompetence.
It goes beyond that, of course. There's no excuse not to provide users with a properly configured environment, install the tools they need to do their job, and provide enough disk space to store their data. (OK. Here's another example: how many storage shops still allocate itty-bitty storage measured in gigabytes?) Yet I see too many systems set up in such a way that it's completely painful to use.
Worse, users (and developers) assume that the systems are intrinsically rubbish and the IT department incompetent. OK, the second part might be true. But that's one reason they go off and try to provide resources for themselves.
As I said earlier, I'm preaching to the converted, right?
As a result, I've had the misfortune to use and fix a wide variety of systems and applications, obviously all built by someone else.
Based on this, I can only come to one conclusion: most Unix Adminstrators hate their users, and do everything they can to make their lives miserable.
That's a pretty grim statement, and I'm hoping that most of the people reading here won't fall into that category. But here's just one example today:
I have to migrate an application, so was given a login to the system so I could check it out. What interactive shell do I get? They've given me, and most users by the looks of it, /bin/sh, on a Solaris 8 box.
Sheesh. I've been using an interactive shell that supports command line recall and editing, not to mention completion and spell-checking, since the 1980s. There is absolutely no excuse in the 21st century not to give users a decent shell. If it's not deliberate hatred of your users, then it's either laziness or incompetence.
It goes beyond that, of course. There's no excuse not to provide users with a properly configured environment, install the tools they need to do their job, and provide enough disk space to store their data. (OK. Here's another example: how many storage shops still allocate itty-bitty storage measured in gigabytes?) Yet I see too many systems set up in such a way that it's completely painful to use.
Worse, users (and developers) assume that the systems are intrinsically rubbish and the IT department incompetent. OK, the second part might be true. But that's one reason they go off and try to provide resources for themselves.
As I said earlier, I'm preaching to the converted, right?
Tuesday, May 28, 2013
The disappearance of packaging
One key differentiator between different Linux
distributions has been the packaging system used. The same is happening
in the world of Illumos distributions, some use IPS, some debian
packaging, SmartOS uses pkgsrc, Tribblix sticks true to the retro feel
of Solaris by using SVR4.
Overall, there's been a huge amount of effort expended on
packaging. Consider the replacement of SVR4 packaging with IPS - a huge
multi-year multi-person effort, that required almost the whole of
Solaris to be retooled to fit. And yet, this is all wasted effort.What of packaging in the future? I see it largely disappearing. You can see this in the consumerization of applications: it's the App Store, not a package repository. Package management is conspicuous by its absence in the modern world of IT. Looking at where Ubuntu are heading, you can see the same thing. That's not the only initiative - look at AppStream for another example.
The point here is that
packages aren't relevant to users. Applications are. Which is why the
notion of overlays is central to Tribblix - at their simplest, overlays
are simply collections of packages (I could have used the term cluster,
but that already has meaning to the Solaris installer, although it was
never exposed to administrators later which was a terrible design), but the idea is that you manage
software at the level of abstraction of an overlay, rather than at a
package level.
Even as a unit of delivery, packages aren't that useful - they normally arise as build artifacts, which don't necessarily map well to user needs. And that's another thing - what constitutes a useful component of a package isn't fixed, but is very much context dependent. Worse, the possible contexts in which a package can be used isn't known ahead of time, so the packager cannot enumerate all the possible uses of the software they're packaging. And an individual package is almost never useful in isolation - most working applications are the leaf nodes of a large complex tree. Dependency management is another game where, if you play, you lose. Rather than tightly-coupled systems with strong dependency management, I'm looking for loosely coupled largely self contained units of delivery. If necessary, application bundles manage their own dependencies rather than relying on the system to do so.
Despite the title, it's not that packaging will disappear, but it will (I hope) become largely invisible.
Monday, May 20, 2013
Sparse root zones in Tribblix
Zones was one of the pillars of Solaris 10 (the others being DTrace, SMF, and ZFS). Lightweight virtualization enabled deployment flexibility and significant consolidation.
The original implementation was heavily integrated with packaging. In many ways, it broke the packaging system. In OpenSolaris and Solaris 11, packaging was completely replaced, the zone implementation is very different, but suffers from the same fundamental flaw - it's integrated at the heart of packaging.
Furthermore, sparse-root zones - where most of the operating system is shared between zones, with just configuration and transient files being unique to a zone - do not exist in the new world order, with each zone now being a separate OS instance. The downside to this, apart from requiring significantly more RAM and disk, is that you then have to manage many instances of the OS, rather than just the one.
In Tribblix, I have reimplemented sparse-root (and whole-root) zones, so that they look very similar to what you had in Solaris 10. The implementation is completely different, though, in that it expects zones to understand packaging rather than expecting packaging to understand zones.
Read here on how to create a sparse-root zone using Tribblix. What follows is some of the under-the-hood details of the implementation I've put together.
First, zone configurations are stored in /etc/zones. If you look on a system that supports zones you'll see a number of xml files in that directory. Some correspond to the zones configured on the system; others are templates. For a sparse-root zone in Solaris 10, there will be some inherited-pkg-dir entries. In the Tribblix implementation, these become simply loopback mounts, handled no differently than any other mount.
Then under /usr/lib/brand you will find a number of directories containing scripts to manage zones. Some of it is shared, some specific to a given brand. I've created a sparse-root and a whole-root brand, and created the scripts to build zones of the correct type.
The key script is called pkgcreatezone, which is the script called to actually populate an empty zone with the bits that will make it work. (It's not called that in Solaris 10 - there you'll find a binary that calls another binary from Live Upgrade to do the work. But in OpenSolaris and Tribblix it's just a script.)
For the ipkg brand, the pkgcreatezone script sets a bunch of IPS variables and creates an IPS image followed by a bit of cleanup. Really, it's nothing complicated.
For the sparse-root brand, you get the main /lib, /usr, /platform, and /sbin directories mounted from the global zone, so you can ignore those. Some standard directories you can simply create. And then all I do is cpio the /etc and /var directories into the zone's file system, and that's it. Well, not quite. I actually use the SVR4 contents file to provide the list of files and directories to copy, so that I don't start copying random junk and only have what's supposed to be there. And one advantage of SVR4 packaging here is that it saves a pristine copy of editable files, so I put that in the zone rather than the modified one. All in all, it takes a couple of seconds or so to install a zone on a physical system, which is far quicker than the traditional zone creation method.
I stumbled across an unfortunate gotcha while doing this. SMF manifests used to be in /var (which was always an odd place to put what are configuration files). They're now in /lib, which is again a very odd place to put configuration files. But this has the unfortunate consequence that, as /lib is loopback mounted into a zone, all the SMF manifests in the global zone will be imported, even though many of them are for services that aren't relevant to a zone, and some of which flat out fail with errors. So what I had to do was create a clone of /lib, delete all the manifests that aren't relevant, and use that as the source for the zone (that's what the /zonelib directory is about, by the way).
When creating a whole-root zone, I simply cpio the /lib, /usr, /platform, and /sbin directories as well. (Cleaning up the SMF manifests as before.) So that takes a few minutes, but is a lot quicker than the old whole-root creation in Solaris 10.
Once I had the zone creation figured, and the /lib shuffle sorted, the remaining problem was zone uninstall. I haven't changed anything for this, but I did need a bit of extra work in system installation.
# beadm list -H
tribblix;51f2d0f4-df6e-6e48-dc0a-a74f37e14930;NR;/;3387047936;static;1361968342
What you see here is the output from beadm list -H. That second field is a UUID that uniquely identifies a boot environment. This is a ZFS property, named org.opensolaris.libbe:uuid, that's set on the ZFS dataset that corresponds to the root filesystem of the specified BE. If you create a zone, its file systems are tagged with the property org.opensolaris.libbe:parentbe that has the same value. When you uninstall a zone, it finds all the file systems that belong to the zone, and checks that they correspond to the currently running boot environment by comparing the UUIDs. I hadn't set this, so nothing matched and uninstall wasn't removing the zone file systems. In the future, the Tribblix installer will set that property and everything that needs it just works.
(As an aside, I ended up writing a quick and dirty script to generate the UUID, as Illumos doesn't actually have one. This is run in a minimalist install context, which I didn't want to bloat, so something that does a SHA1 digest of some data from /dev/random and mocks up the correct form does the trick nicely.)
So, the next release of Tribblix, the 0m6 prerelease, includes support for traditional whole-root and sparse-root zones. The point here isn't merely to simply replicate what's gone before, useful as that is. What this also shows is that, freed from the predefined constraints of a packaging system, you can generate completely arbitrary zone configurations, opening up a whole new array of possibilities.
The original implementation was heavily integrated with packaging. In many ways, it broke the packaging system. In OpenSolaris and Solaris 11, packaging was completely replaced, the zone implementation is very different, but suffers from the same fundamental flaw - it's integrated at the heart of packaging.
Furthermore, sparse-root zones - where most of the operating system is shared between zones, with just configuration and transient files being unique to a zone - do not exist in the new world order, with each zone now being a separate OS instance. The downside to this, apart from requiring significantly more RAM and disk, is that you then have to manage many instances of the OS, rather than just the one.
In Tribblix, I have reimplemented sparse-root (and whole-root) zones, so that they look very similar to what you had in Solaris 10. The implementation is completely different, though, in that it expects zones to understand packaging rather than expecting packaging to understand zones.
Read here on how to create a sparse-root zone using Tribblix. What follows is some of the under-the-hood details of the implementation I've put together.
First, zone configurations are stored in /etc/zones. If you look on a system that supports zones you'll see a number of xml files in that directory. Some correspond to the zones configured on the system; others are templates. For a sparse-root zone in Solaris 10, there will be some inherited-pkg-dir entries. In the Tribblix implementation, these become simply loopback mounts, handled no differently than any other mount.
Then under /usr/lib/brand you will find a number of directories containing scripts to manage zones. Some of it is shared, some specific to a given brand. I've created a sparse-root and a whole-root brand, and created the scripts to build zones of the correct type.
The key script is called pkgcreatezone, which is the script called to actually populate an empty zone with the bits that will make it work. (It's not called that in Solaris 10 - there you'll find a binary that calls another binary from Live Upgrade to do the work. But in OpenSolaris and Tribblix it's just a script.)
For the ipkg brand, the pkgcreatezone script sets a bunch of IPS variables and creates an IPS image followed by a bit of cleanup. Really, it's nothing complicated.
For the sparse-root brand, you get the main /lib, /usr, /platform, and /sbin directories mounted from the global zone, so you can ignore those. Some standard directories you can simply create. And then all I do is cpio the /etc and /var directories into the zone's file system, and that's it. Well, not quite. I actually use the SVR4 contents file to provide the list of files and directories to copy, so that I don't start copying random junk and only have what's supposed to be there. And one advantage of SVR4 packaging here is that it saves a pristine copy of editable files, so I put that in the zone rather than the modified one. All in all, it takes a couple of seconds or so to install a zone on a physical system, which is far quicker than the traditional zone creation method.
I stumbled across an unfortunate gotcha while doing this. SMF manifests used to be in /var (which was always an odd place to put what are configuration files). They're now in /lib, which is again a very odd place to put configuration files. But this has the unfortunate consequence that, as /lib is loopback mounted into a zone, all the SMF manifests in the global zone will be imported, even though many of them are for services that aren't relevant to a zone, and some of which flat out fail with errors. So what I had to do was create a clone of /lib, delete all the manifests that aren't relevant, and use that as the source for the zone (that's what the /zonelib directory is about, by the way).
When creating a whole-root zone, I simply cpio the /lib, /usr, /platform, and /sbin directories as well. (Cleaning up the SMF manifests as before.) So that takes a few minutes, but is a lot quicker than the old whole-root creation in Solaris 10.
Once I had the zone creation figured, and the /lib shuffle sorted, the remaining problem was zone uninstall. I haven't changed anything for this, but I did need a bit of extra work in system installation.
# beadm list -H
tribblix;51f2d0f4-df6e-6e48-dc0a-a74f37e14930;NR;/;3387047936;static;1361968342
What you see here is the output from beadm list -H. That second field is a UUID that uniquely identifies a boot environment. This is a ZFS property, named org.opensolaris.libbe:uuid, that's set on the ZFS dataset that corresponds to the root filesystem of the specified BE. If you create a zone, its file systems are tagged with the property org.opensolaris.libbe:parentbe that has the same value. When you uninstall a zone, it finds all the file systems that belong to the zone, and checks that they correspond to the currently running boot environment by comparing the UUIDs. I hadn't set this, so nothing matched and uninstall wasn't removing the zone file systems. In the future, the Tribblix installer will set that property and everything that needs it just works.
(As an aside, I ended up writing a quick and dirty script to generate the UUID, as Illumos doesn't actually have one. This is run in a minimalist install context, which I didn't want to bloat, so something that does a SHA1 digest of some data from /dev/random and mocks up the correct form does the trick nicely.)
So, the next release of Tribblix, the 0m6 prerelease, includes support for traditional whole-root and sparse-root zones. The point here isn't merely to simply replicate what's gone before, useful as that is. What this also shows is that, freed from the predefined constraints of a packaging system, you can generate completely arbitrary zone configurations, opening up a whole new array of possibilities.
Monday, May 06, 2013
Seeking the golden turd
Certain trends in IT become popular. The next big thing, as it were.
That's according to the pundits. Who often have a product to sell that they've slapped the latest trendy label on, or a professional services arm ready to take a wad of your cash on a consulting engagement.
Take Big Data, as an example. (Even the name is an oxymoron.) Let me summarize:
Big Data is all about wading through a cesspit of data searching for a useful nugget of information.
The related trend of Analytics is about polishing what you find until it shines.
Businesses can be fooled into thinking they have a valuable nugget; break it open and you discover it's just a turd.
That's according to the pundits. Who often have a product to sell that they've slapped the latest trendy label on, or a professional services arm ready to take a wad of your cash on a consulting engagement.
Take Big Data, as an example. (Even the name is an oxymoron.) Let me summarize:
Big Data is all about wading through a cesspit of data searching for a useful nugget of information.
The related trend of Analytics is about polishing what you find until it shines.
Businesses can be fooled into thinking they have a valuable nugget; break it open and you discover it's just a turd.
Sunday, April 21, 2013
Tribblix 0m5 - solidification
In Tribblix Milestone 5, there's the dual element of increasing solidity and new development.
First, the new development: ZAP is a simple network package install utility. As in, really simple. Use it like so (as root):
zap install-overlay openexr
or
zap install TRIBpekwm
It should be obvious that it's nowhere near finished, but the necessary first step of having the command exist and the packages be available on the network has been achieved.
As part of that, the funky pkgs.zlib file on the iso that used to be lofi mounted for package installtion has gone. Instead, there's a directory with packages (in zap format) inside it. This is far simpler, and is also much quicker. With a little extra care in package construction, it's also smaller.
Next, a reversion. I've reverted the compiler and toolchain back to gcc3, as in earlier versions and matching OpenIndiana. Migrating to gcc4 is still a target (and is necessary for some newer software) but it has to be done right, and I'm not entirely happy with the gcc4 builds I've been testing. get the system compiler and toolchain wrong, and it's a mistake you have to live with for years.
And there's some polish. Most of this is covered by the change list. Many packages have been rebuilt, which can bring them up to date, optimize their space usage, or build them to my standards rather than importing them from OpenIndiana. Firefox is current, which is important. And there are little things, like including some themes for WindowMaker.
I've said before that there's no real roadmap or release schedule - this is, after all, largely a hobby project. And two months between milestones is rather longer than I would have liked. But to give you a flavour of what might be coming up - gcc4 done right, upgrades, LibreOffice, and working zones are all targets. (Of course, there's significant work in all those areas.)
First, the new development: ZAP is a simple network package install utility. As in, really simple. Use it like so (as root):
zap install-overlay openexr
or
zap install TRIBpekwm
It should be obvious that it's nowhere near finished, but the necessary first step of having the command exist and the packages be available on the network has been achieved.
As part of that, the funky pkgs.zlib file on the iso that used to be lofi mounted for package installtion has gone. Instead, there's a directory with packages (in zap format) inside it. This is far simpler, and is also much quicker. With a little extra care in package construction, it's also smaller.
Next, a reversion. I've reverted the compiler and toolchain back to gcc3, as in earlier versions and matching OpenIndiana. Migrating to gcc4 is still a target (and is necessary for some newer software) but it has to be done right, and I'm not entirely happy with the gcc4 builds I've been testing. get the system compiler and toolchain wrong, and it's a mistake you have to live with for years.
And there's some polish. Most of this is covered by the change list. Many packages have been rebuilt, which can bring them up to date, optimize their space usage, or build them to my standards rather than importing them from OpenIndiana. Firefox is current, which is important. And there are little things, like including some themes for WindowMaker.
I've said before that there's no real roadmap or release schedule - this is, after all, largely a hobby project. And two months between milestones is rather longer than I would have liked. But to give you a flavour of what might be coming up - gcc4 done right, upgrades, LibreOffice, and working zones are all targets. (Of course, there's significant work in all those areas.)
Sunday, April 14, 2013
Zip Archive Packaging
Under the hood, Tribblix uses the traditional SVR4 packaging utilities. There are a number of reasons for this - compatibility, simplicity, and a low footprint are among them. They're also good enough to get the job done. (And my strong belief is that the underlying package tools should become invisible and thus their implementation irrelevant, so the simpler and smaller the better.)
While SVR4 packaging does support installation of packages from networked locations over http, the support isn't great. The native support was almost never used in practice and its implementation is pretty poor (so much so that I would much rather just rip it out to simplify the code).
Allowing package installation from network repositories is expected of any modern system. However, the packaging system itself doesn't need to do so natively. There are any number of utilities and toolkits to do the network retrieval part - curl, wget, and essentially every modern scripting language will do the job.
Which leaves only the question as to what format to use in putting the data on your networked repository. The requirements here are:
The alternative solution I'm using is to simply zip up the filesystem format into a zip file. Hence, Zip Archive Packaging or zap for short.
This has the following advantages:
So installing a package from a network repo in Tribblix is down to a very simple shell script that runs curl + unzip + pkgadd.
While SVR4 packaging does support installation of packages from networked locations over http, the support isn't great. The native support was almost never used in practice and its implementation is pretty poor (so much so that I would much rather just rip it out to simplify the code).
Allowing package installation from network repositories is expected of any modern system. However, the packaging system itself doesn't need to do so natively. There are any number of utilities and toolkits to do the network retrieval part - curl, wget, and essentially every modern scripting language will do the job.
Which leaves only the question as to what format to use in putting the data on your networked repository. The requirements here are:
- A package is packed up into a single file, to allow easy and efficient transfer using any medium
- The package should be compressed
- The contents of the package should be easily accessible on any platform without special tools
- A file should be able to contain multiple packages
The alternative solution I'm using is to simply zip up the filesystem format into a zip file. Hence, Zip Archive Packaging or zap for short.
This has the following advantages:
- Single file, can contain multiple packages
- Natively compressed
- Widespread support to unpack the archives
- Efficient random access
- Efficient extraction of list of contents
- Widely used in other contexts (eg. jar, war files)
- Some level of data integrity checking
- No need for any additional tools
- Supports extensibility for additional functionality later
So installing a package from a network repo in Tribblix is down to a very simple shell script that runs curl + unzip + pkgadd.
Thursday, March 28, 2013
Zipping up tighter
I've recently been creating a lot of zip files. Now, for this purpose the output has to be a regular zip file - readable by all the zip tools out there, including older versions and the jar utility. Change format and you can get better compression, for sure, but you're not compatible with all the existing tools. That rules out the bzip2 support in newer versions of zip and unzip, as well.
To create a zipfile with the zip command is basically:
zip -9 -q -r output.zip input_files ...
Now, p7zip can also create zip files (and others) that are absolutely compatible.
7za a -tzip -mx=9 -mfb=256 output.zip input_files ...
On my test data, this gives an additional 4% over the best that zip can do. Might not sound much, but on a CD-sized iso image that's an additional 30M of data you can squeeze in.
To create a zipfile with the zip command is basically:
zip -9 -q -r output.zip input_files ...
Now, p7zip can also create zip files (and others) that are absolutely compatible.
7za a -tzip -mx=9 -mfb=256 output.zip input_files ...
On my test data, this gives an additional 4% over the best that zip can do. Might not sound much, but on a CD-sized iso image that's an additional 30M of data you can squeeze in.
Saturday, March 02, 2013
Tribblix 0m4 - wake up and smell the coffee
For Tribblix, I don't have a formal development or release schedule.
What I do have is a set of targets or Milestones, which may be features, software, or part of the build process. What I don't have is any dates associated with these, or any specific order in which they might get worked on.
As a rough summary of the milestones so far:
This allows me to include the other tools I've developed, JKstat, KAR, JProc, and SolView as part of the distribution.
Time to put the kettle on and enjoy the coffee.
What I do have is a set of targets or Milestones, which may be features, software, or part of the build process. What I don't have is any dates associated with these, or any specific order in which they might get worked on.
As a rough summary of the milestones so far:
- Milestone 0 simply proved that I could make a distribution that worked
- Milestone 1 added Xfce
- Milestone 2 used packages from an Illumos build, rather than indirectly via OpenIndiana
- Milestone 3 added Enlightenment E17, went up to gcc 4.7.2 as the base compiler, and included LZ4 compression for ZFS
This allows me to include the other tools I've developed, JKstat, KAR, JProc, and SolView as part of the distribution.
Time to put the kettle on and enjoy the coffee.
Monday, February 25, 2013
1.0 - jkstat, kar, jproc, and solview
After working on them for ages, I've finally released JKstat, KAR, JProc, and SolView as version 1.0.
There are not many changes, no earth-shattering new features, actually very little has changed. And that's largely the point - development has slowed, and what's there is largely stable and unlikely to change. So it's time to call it 1.0 and have done with it.
A second reason is that there are a number of changes that I would like to make, that require incompatible change. There are changes in Solaris and the open-source Illumos derivatives that would make JKstat in particular incompatible, and I would like to migrate to a more recent Java as a baseline. So the 1.0 versions (and any micro releases to fix problems) will remain compatible with Solaris 10 and Java 5, while new development will focus on a forthcoming version 2.0 that will require something newer than Solaris 10 (possibly compatible with recent Solaris 10 updates) and will jump to Java 7.
There are not many changes, no earth-shattering new features, actually very little has changed. And that's largely the point - development has slowed, and what's there is largely stable and unlikely to change. So it's time to call it 1.0 and have done with it.
A second reason is that there are a number of changes that I would like to make, that require incompatible change. There are changes in Solaris and the open-source Illumos derivatives that would make JKstat in particular incompatible, and I would like to migrate to a more recent Java as a baseline. So the 1.0 versions (and any micro releases to fix problems) will remain compatible with Solaris 10 and Java 5, while new development will focus on a forthcoming version 2.0 that will require something newer than Solaris 10 (possibly compatible with recent Solaris 10 updates) and will jump to Java 7.
Sunday, November 18, 2012
Creating the Tribblix ramdisk
When you're running Tribblix off the live iso image, most of what you're using is actually just one file - the initial ramdisk loaded into memory.
Putting together the ramdisk was one of the trickier areas of getting Tribblix working. It tok a while to work out exactly what needed to be in there.
As part of the build, a minimalist OS is installed into a build area. The simplest approach is to put all of that into the ramdisk. That works, but can be pretty large - for a base build, you're looking at a 512M ramdisk. While this is fine for many modern systems, it's a significant constraint when installing into VirtualBox (because you can only assign a relatively small fraction of your available memory to the entire virtual instance). Besides, being efficient is a target for Tribblix.
So what happens is that /usr, which is the largest part, and can get very large indeed, is handled separately. What ends up in the ramdisk is everything else, with /usr mounted later.
However, there's a catch. There's a tiny amount of /usr that needs to be in the ramdisk to get /usr mounted. Part of this is intrinsic to the special mechanism that's used to mount /usr, and it took some experimentation to work out exactly what files are required.
Other than /usr, the ramdisk contains everything that would be installed. The installation routine simply copies the running OS to disk (and then optionally adds further packages). So there's no fiddling around with what's on the ramdisk. (In OpenSolaris and OpenIndiana, some of the files are parked off in solarismisc.zlib and linked to. I don't need to do that, so solarismisc.zlib doesn't exist in Tribblix.)
And because the contents of the installed system are taken straight off the ramdisk, the ramdisk contains both 32 and 64-bit files. Creating separate 32 and 64-bit ramdisks might make each ramdisk smaller, but would take up more space overall (because there is duplication) and makes the install much more complex. Thus, when grub boots, it uses $ISADIR to choose the right kernel but the boot archive is fixed.
So how is the ramdisk built? It's actually very simple.
Putting together the ramdisk was one of the trickier areas of getting Tribblix working. It tok a while to work out exactly what needed to be in there.
As part of the build, a minimalist OS is installed into a build area. The simplest approach is to put all of that into the ramdisk. That works, but can be pretty large - for a base build, you're looking at a 512M ramdisk. While this is fine for many modern systems, it's a significant constraint when installing into VirtualBox (because you can only assign a relatively small fraction of your available memory to the entire virtual instance). Besides, being efficient is a target for Tribblix.
So what happens is that /usr, which is the largest part, and can get very large indeed, is handled separately. What ends up in the ramdisk is everything else, with /usr mounted later.
However, there's a catch. There's a tiny amount of /usr that needs to be in the ramdisk to get /usr mounted. Part of this is intrinsic to the special mechanism that's used to mount /usr, and it took some experimentation to work out exactly what files are required.
Other than /usr, the ramdisk contains everything that would be installed. The installation routine simply copies the running OS to disk (and then optionally adds further packages). So there's no fiddling around with what's on the ramdisk. (In OpenSolaris and OpenIndiana, some of the files are parked off in solarismisc.zlib and linked to. I don't need to do that, so solarismisc.zlib doesn't exist in Tribblix.)
And because the contents of the installed system are taken straight off the ramdisk, the ramdisk contains both 32 and 64-bit files. Creating separate 32 and 64-bit ramdisks might make each ramdisk smaller, but would take up more space overall (because there is duplication) and makes the install much more complex. Thus, when grub boots, it uses $ISADIR to choose the right kernel but the boot archive is fixed.
So how is the ramdisk built? It's actually very simple.
- Use mkfile to create a file of the correct size, such as 192m
- Use lofiadm to create a device containing the file
- Use newfs to create a ufs file system on the device. Because we know exactly what it's for we can tune the free space to zero and the number of inodes
- Mount that somewhere temporarily
- Copy all the temporary install location to it, except /usr
- Copy the handful of files from /usr into place
- Drop an SMF repository into place. (I copy one from a booted system that's correctly imported.)
- There are a few files and directories need by the live boot that need to be created
- Unmount the file system and remove the lofi device, then gzip the file.
- Then copy the compressed file into where you've told grub to look for the boot archive (/platform/i86pc/boot_archive)
Tuesday, November 06, 2012
Tribblix Milestone 1
An updated release of Tribblix is now available for download.
This version is built from the same base as the initial release, namely OpenIndiana OI151a7, so is whatever version of Illumos that corresponds to.
Milestone 1 adds Xfce, Firefox 16.0.1, emacs, python, cmake, and AfterStep.
Despite all the additional software, the ISO image isn't much larger than before, due to significant improvements in the way that the ISO is constructed. Essentially, there was quite a bit of duplication on the ISO of files that were already in the ramdisk.
Tribblix is still a long way from production ready, but for everyday office use it's got a decent desktop, an editor, and a web browser, so that's a fair fraction of the workload covered.
This version is built from the same base as the initial release, namely OpenIndiana OI151a7, so is whatever version of Illumos that corresponds to.
Milestone 1 adds Xfce, Firefox 16.0.1, emacs, python, cmake, and AfterStep.
Despite all the additional software, the ISO image isn't much larger than before, due to significant improvements in the way that the ISO is constructed. Essentially, there was quite a bit of duplication on the ISO of files that were already in the ramdisk.
Tribblix is still a long way from production ready, but for everyday office use it's got a decent desktop, an editor, and a web browser, so that's a fair fraction of the workload covered.
Monday, October 29, 2012
How to build Tribblix
The scripts and configuration files that I used to build Tribblix are now available on github.
There are currently two components available. There are some more bits and pieces that I'm still working on. (Specifically, the live image manifests and method scripts, and the overlay mechanism.)
First, the ips2svr4 repo contains the scripts used to create the SVR4 packages. The initial Tribblix prerelease was based on an OpenIndiana 151a7 install, I simply converted all the packages wholesale. One of the problems I had was that an installed system has had lots of configuration applied, so I needed to nullify many of the changes made to system files. There's also an equivalent script that can make SVR4 packages from an IPS on-disk repo; I've tested that I can make packages from an Illumos build, but haven't yet tried to build a system from them. (At least I know the OI binaries work on the system I'm testing.)
Next, the tribblix-build repo contains the scripts used to install the packages to a staging area, fix up that install, create the zlib files, build the boot archive, and create the iso, along with the live_install script that's used to install to hard disk.
The scripts are ugly. Mostly, I was doing the steps by hand and simply saved the commands into the scripts so I didn't have to type it next time. That they can be improved is undoubted. I hope I've taken most of the profane language in the comments I put in as I found out what worked and what didn't along the way.
The second problem anybody else is going to have with the scripts is that they have myself embedded in them. When I'm doing the construction, I'm always working from my own home directory, so it's currently hard-coded, as are all the other locations. That will get fixed, but it's more fun building a better distro than making the scripts suitable for a beauty contest.
There are currently two components available. There are some more bits and pieces that I'm still working on. (Specifically, the live image manifests and method scripts, and the overlay mechanism.)
First, the ips2svr4 repo contains the scripts used to create the SVR4 packages. The initial Tribblix prerelease was based on an OpenIndiana 151a7 install, I simply converted all the packages wholesale. One of the problems I had was that an installed system has had lots of configuration applied, so I needed to nullify many of the changes made to system files. There's also an equivalent script that can make SVR4 packages from an IPS on-disk repo; I've tested that I can make packages from an Illumos build, but haven't yet tried to build a system from them. (At least I know the OI binaries work on the system I'm testing.)
Next, the tribblix-build repo contains the scripts used to install the packages to a staging area, fix up that install, create the zlib files, build the boot archive, and create the iso, along with the live_install script that's used to install to hard disk.
The scripts are ugly. Mostly, I was doing the steps by hand and simply saved the commands into the scripts so I didn't have to type it next time. That they can be improved is undoubted. I hope I've taken most of the profane language in the comments I put in as I found out what worked and what didn't along the way.
The second problem anybody else is going to have with the scripts is that they have myself embedded in them. When I'm doing the construction, I'm always working from my own home directory, so it's currently hard-coded, as are all the other locations. That will get fixed, but it's more fun building a better distro than making the scripts suitable for a beauty contest.
Friday, October 26, 2012
Those strange zlib files
If you look at an OpenIndiana live CD, you'll see a couple of strangely named files - solaris.zlib and solarismisc.zlib. What are these, how can you access their contents, and how can you build your own?
These are actually archives of parts of the filesystem. In the case of solaris.zlib, it's /usr; for solarismisc.zlib it's /etc, /var, and /opt.
These are regular iso images, compressed with lofiadm. So you can use lofiadm against the file to create a lofi device, and mount that up as you would anything else. During the live boot, solaris.zlib gets mounted up at /usr. (There have to be some minimal bits of /usr in the boot archive; that's another story.)
Building these archives is very easy. Just go to where the directory you want to archive is and use mkisofs, like so:
mkisofs -o solaris.zlib -quiet -N \
-l -R -U -allow-multidot \
-no-iso-translate -cache-inodes \
-d -D -V "compress" usr
Then you can ask lofiadm to compress the archive
lofiadm -C gzip solaris.zlib
The compression options are gzip, gzip-9, and lzma. On the content I'm using, I found that basic gzip gives me 3-4x compression, and lzma a bit more at 4-5x. However, using lzma takes an order of magnitude longer to compress, and you get maybe half the read performance. There's a trade-off of additional space saving against the performance hit, which is clearly something you need to consider.
For Tribblix, I use the same trick, although I'm planning to get rid of the extra solarismisc.zlib. And I'm hoping that being lean will mean that I don't need the extra lzma compression, so I can stay fast.
These are actually archives of parts of the filesystem. In the case of solaris.zlib, it's /usr; for solarismisc.zlib it's /etc, /var, and /opt.
These are regular iso images, compressed with lofiadm. So you can use lofiadm against the file to create a lofi device, and mount that up as you would anything else. During the live boot, solaris.zlib gets mounted up at /usr. (There have to be some minimal bits of /usr in the boot archive; that's another story.)
Building these archives is very easy. Just go to where the directory you want to archive is and use mkisofs, like so:
mkisofs -o solaris.zlib -quiet -N \
-l -R -U -allow-multidot \
-no-iso-translate -cache-inodes \
-d -D -V "compress" usr
Then you can ask lofiadm to compress the archive
lofiadm -C gzip solaris.zlib
The compression options are gzip, gzip-9, and lzma. On the content I'm using, I found that basic gzip gives me 3-4x compression, and lzma a bit more at 4-5x. However, using lzma takes an order of magnitude longer to compress, and you get maybe half the read performance. There's a trade-off of additional space saving against the performance hit, which is clearly something you need to consider.
For Tribblix, I use the same trick, although I'm planning to get rid of the extra solarismisc.zlib. And I'm hoping that being lean will mean that I don't need the extra lzma compression, so I can stay fast.
Wednesday, October 24, 2012
Building Tribblix
I've recently been working on putting together a distribution based on OpenSolaris, OpenIndiana, and Illumos.
Called Tribblix, it was quite challenging to put together. I'll cover the individual pieces in more detail as time goes on, and put the code up so anybody else can do the same. But here's the rough overview of the process.
First, I've created SVR4 packages - I can do this either from an installed system, or from an on-disk repo. The IPS manifests contain all the information required to construct a package in other formats, not only what files are in the package, but also the scripting metadata that can be used to generate the SVR4 installation scripts. The most complex piece is actually generating the somewhat arcane and meaningless SVR4 package name from the equally arcane and meaningless IPS package name, making sure it fits into the 32 character limit imposed by the SVR4 tools. This has to be repeatable, as I use the same transformation in dependencies.
(An aside on dependencies: there are significant areas of brokenness in the IPS package dependencies on OpenIndiana, not to mention problems with how files are split into packages. There's significant refactoring required to restore sanity.)
Then I simply install the required packages for a minimal system into a build area. Of course, it took a little experimentation to work out what packages are necessary. There's an extra package for the OpenSolaris live CD that goes on as well.
There's then some fiddling with the installed image, setting up an initial SMF repository, SMF profiles, and grub. Something in need of more attention is the construction of the boot archive. I've got it to work, but it's not perfect.
The zlib archives you find on the live cd are then put together (these are lofi compressed iso images), plus an extra archive containing extra packages, and then mkisofs creates the iso.
The installer is very simple. I need to work on automating disk partitioning, as it's currently left to the user to configure the disk by hand. Then a ZFS pool is created and mounted up. The booted image is fairly minimalist, so that is simply copied across wholesale. It's unlikely that you would want less on the installed system than you would on the initial boot. I delete the live cd package, and then optionally add sets of additional packages.
Then grub configuration, setting up SMF for a real boot (which has different SMF profiles), creating the real boot archive (which currently takes an order of magnitude longer than it should), and finally setting up the live filesystems so they end up in the right place.
That's pretty much it. Descriptions of each step will be forthcoming in future blog posts, together with the code on github.
Called Tribblix, it was quite challenging to put together. I'll cover the individual pieces in more detail as time goes on, and put the code up so anybody else can do the same. But here's the rough overview of the process.
First, I've created SVR4 packages - I can do this either from an installed system, or from an on-disk repo. The IPS manifests contain all the information required to construct a package in other formats, not only what files are in the package, but also the scripting metadata that can be used to generate the SVR4 installation scripts. The most complex piece is actually generating the somewhat arcane and meaningless SVR4 package name from the equally arcane and meaningless IPS package name, making sure it fits into the 32 character limit imposed by the SVR4 tools. This has to be repeatable, as I use the same transformation in dependencies.
(An aside on dependencies: there are significant areas of brokenness in the IPS package dependencies on OpenIndiana, not to mention problems with how files are split into packages. There's significant refactoring required to restore sanity.)
Then I simply install the required packages for a minimal system into a build area. Of course, it took a little experimentation to work out what packages are necessary. There's an extra package for the OpenSolaris live CD that goes on as well.
There's then some fiddling with the installed image, setting up an initial SMF repository, SMF profiles, and grub. Something in need of more attention is the construction of the boot archive. I've got it to work, but it's not perfect.
The zlib archives you find on the live cd are then put together (these are lofi compressed iso images), plus an extra archive containing extra packages, and then mkisofs creates the iso.
The installer is very simple. I need to work on automating disk partitioning, as it's currently left to the user to configure the disk by hand. Then a ZFS pool is created and mounted up. The booted image is fairly minimalist, so that is simply copied across wholesale. It's unlikely that you would want less on the installed system than you would on the initial boot. I delete the live cd package, and then optionally add sets of additional packages.
Then grub configuration, setting up SMF for a real boot (which has different SMF profiles), creating the real boot archive (which currently takes an order of magnitude longer than it should), and finally setting up the live filesystems so they end up in the right place.
That's pretty much it. Descriptions of each step will be forthcoming in future blog posts, together with the code on github.
Tuesday, September 25, 2012
Mangling the contents file for fun and profit
I was recently using Live Upgrade to update a Solaris 10 system, when it went and chucked the following error at me and refused to go any further:
WARNING: Directory </usr/openv> zone <global> lies on a filesystem shared between BEs, remapping path to </usr/openv-S10U10>.
WARNING: Device <storage/backup> is shared between BEs, remapping to <storage/backup-S10U10>.
Mounting ABE <S10U10>.
ERROR: error retrieving mountpoint source for dataset <storage/backup-S10U10>
ERROR: failed to mount file system <storage/backup-S10U10> on </.alt.tmp.b-yPg.mnt/usr/openv-S10U10>
What I have is Netbackup installed in /usr/openv, and this is a separate filesystem (in fact, it's on a completely separate pool on completely separate drives).
The underlying problem here is that Solaris thinks there's part of the OS installed in /usr/openv, so it gets included in the scope of the upgrade. I've seen this in other cases where someone has stuck Netbackup off to the side, and it drags way too much stuff into scope.
On backup clients, the simplest thing to do is remove the client and reinstall it when you're done. You might get a free upgrade of the backup client along the way.
In this case I was working on the master backup server and didn't want to touch the installation at all.
One advantage of SVR4 packaging is that the package "database" is just a bunch of text files. If anything gets messed up you can open them up in your favourite editor and fix things up. (In one case, I remember simply copying /var/sadm off a similar system and nothing noticed the difference.)
The list of what files are installed is the contents file (found at /var/sadm/install/contents). The Live Upgrade process looks at this file to work out where software is installed. So all I had to do here was
grep /usr/openv contents > contents.openv
to save the entries for later, and
grep -v /usr/openv contents > contents.new
mv contents.new contents
to create a contents file without any references to /usr/openv.
After this, Live Upgrade worked a treat and didn't try and stick its nose where it wasn't wanted.
Then, after the upgrade, I just had to merge the saved contents.openv I saved above into the new contents file. There's a bit of a trick here - the contents file is sorted on filename, so you can't just cat them together. I opened up the new contents file, went to the right place, inserted the saved entries, and was good to go.
WARNING: Directory </usr/openv> zone <global> lies on a filesystem shared between BEs, remapping path to </usr/openv-S10U10>.
WARNING: Device <storage/backup> is shared between BEs, remapping to <storage/backup-S10U10>.
Mounting ABE <S10U10>.
ERROR: error retrieving mountpoint source for dataset <storage/backup-S10U10>
ERROR: failed to mount file system <storage/backup-S10U10> on </.alt.tmp.b-yPg.mnt/usr/openv-S10U10>
What I have is Netbackup installed in /usr/openv, and this is a separate filesystem (in fact, it's on a completely separate pool on completely separate drives).
The underlying problem here is that Solaris thinks there's part of the OS installed in /usr/openv, so it gets included in the scope of the upgrade. I've seen this in other cases where someone has stuck Netbackup off to the side, and it drags way too much stuff into scope.
On backup clients, the simplest thing to do is remove the client and reinstall it when you're done. You might get a free upgrade of the backup client along the way.
In this case I was working on the master backup server and didn't want to touch the installation at all.
One advantage of SVR4 packaging is that the package "database" is just a bunch of text files. If anything gets messed up you can open them up in your favourite editor and fix things up. (In one case, I remember simply copying /var/sadm off a similar system and nothing noticed the difference.)
The list of what files are installed is the contents file (found at /var/sadm/install/contents). The Live Upgrade process looks at this file to work out where software is installed. So all I had to do here was
grep /usr/openv contents > contents.openv
to save the entries for later, and
grep -v /usr/openv contents > contents.new
mv contents.new contents
to create a contents file without any references to /usr/openv.
After this, Live Upgrade worked a treat and didn't try and stick its nose where it wasn't wanted.
Then, after the upgrade, I just had to merge the saved contents.openv I saved above into the new contents file. There's a bit of a trick here - the contents file is sorted on filename, so you can't just cat them together. I opened up the new contents file, went to the right place, inserted the saved entries, and was good to go.
Recursive zfs send and receive
I normally keep my ZFS filesystem hierarchy simple, so that the filesystem boundary is the boundary of administrative activity. So migrating a filesystem from one place to another is usually as simple as:
zfs snapshot tank/a@copy
zfs send tank/a@copy | zfs recv cistern/a
However, if you have child filesystems, and clones in particular, that you want to move, then it's slightly more involved. Suppose you have the following
tank/a/myfiles
tank/a/myfiles@clone
tank/a/myfiles-clone
where myfiles-clone is a clone of the @clone snapshot. I often create these temporarily if someone wants a copy of some data in a slightly different layout. In today's case, it had taken some time to shuffle the files around in the clone and I didn't want to have to do that all over again.
So, ZFS has recursive send and receive. The first thing I learnt is that myfiles-clone isn't really a descendant of myfiles - think of it as more of a sibling. So in this case you start from tank/a and send everything under that. First create a recursive snapshot:
zfs snapshot -r tank/a@copy
Then to send the whole lot
zfs send -R tank/a@copy
I was rather naive and thought that
zfs send -R tank/a@copy | zfs recv cistern/a
would do what I wanted - simply drop everything into cistern/a, and was somewhat surprised that this doesn't work. Particularly as ZFS almost always just works and does what you expect.
What went wrong? What I think happens here is that the recursive copy effectively does:
zfs send tank/a@copy | zfs recv cistern/a
zfs send tank/a/myfiles@copy | zfs recv cistern/a
zfs send tank/a/myfiles-clone@copy | zfs recv cistern/a
and attempts to put all the child filesystems in the same place, which fails rather badly. (You can see the hierarchy that would be created on the receiving side by using 'zfs recv -vn'.)
The way to solve this is to use the -e or -d options of zfs recv, like so:
zfs send -R tank/a@copy | zfs recv -d cistern/a
or
zfs send -R tank/a@copy | zfs recv -e cistern/a
In both cases it uses the name of the source dataset to construct the name at the destination, so it will lay it out properly.
The difference (read the man page) is that -e simply uses the last part of the source name at the destination. In this example, this was fine, but if you start off with a hierarchy it will get flattened (and you could potentially have naming collisions). With -d, it will just strip off the beginning (in this case, tank), so that the structure of the hierarchy is preserved, although you may end up with extra levels at the destination. If it's not quite right, though, zfs rename can sort it all out.
zfs snapshot tank/a@copy
zfs send tank/a@copy | zfs recv cistern/a
However, if you have child filesystems, and clones in particular, that you want to move, then it's slightly more involved. Suppose you have the following
tank/a/myfiles
tank/a/myfiles@clone
tank/a/myfiles-clone
where myfiles-clone is a clone of the @clone snapshot. I often create these temporarily if someone wants a copy of some data in a slightly different layout. In today's case, it had taken some time to shuffle the files around in the clone and I didn't want to have to do that all over again.
So, ZFS has recursive send and receive. The first thing I learnt is that myfiles-clone isn't really a descendant of myfiles - think of it as more of a sibling. So in this case you start from tank/a and send everything under that. First create a recursive snapshot:
zfs snapshot -r tank/a@copy
Then to send the whole lot
zfs send -R tank/a@copy
I was rather naive and thought that
zfs send -R tank/a@copy | zfs recv cistern/a
would do what I wanted - simply drop everything into cistern/a, and was somewhat surprised that this doesn't work. Particularly as ZFS almost always just works and does what you expect.
What went wrong? What I think happens here is that the recursive copy effectively does:
zfs send tank/a@copy | zfs recv cistern/a
zfs send tank/a/myfiles@copy | zfs recv cistern/a
zfs send tank/a/myfiles-clone@copy | zfs recv cistern/a
and attempts to put all the child filesystems in the same place, which fails rather badly. (You can see the hierarchy that would be created on the receiving side by using 'zfs recv -vn'.)
The way to solve this is to use the -e or -d options of zfs recv, like so:
zfs send -R tank/a@copy | zfs recv -d cistern/a
or
zfs send -R tank/a@copy | zfs recv -e cistern/a
In both cases it uses the name of the source dataset to construct the name at the destination, so it will lay it out properly.
The difference (read the man page) is that -e simply uses the last part of the source name at the destination. In this example, this was fine, but if you start off with a hierarchy it will get flattened (and you could potentially have naming collisions). With -d, it will just strip off the beginning (in this case, tank), so that the structure of the hierarchy is preserved, although you may end up with extra levels at the destination. If it's not quite right, though, zfs rename can sort it all out.
Monday, September 10, 2012
iTribble
Just over a month or two ago, I wasn't an Apple customer. Sure, my daughter had an iPad (which I had used for a little development), but I didn't own or use any Apple devices myself.
Then my company mobile phone gave up the ghost. I had a Galaxy SII, and was assuming that I would get an SIII when the renewal came due. However, my old phone simply died a few days before the SIII became available in the UK, and I got an iPhone instead as it was actually available there and then.
The iPhone is OK, I guess. I'm not really a heavy smartphone user, it's handy to have some of the features but I wouldn't say that they're really crucial to me. My own personal phone is many years old now, and is one of those increasingly rare device that's actually useful for making phone calls. Generally, though, I wouldn't say that the iPhone is dramatically better than the Galaxy SII I had before; it's a bit more polished, but that's about all.
When it comes to spending my own cash, I then got myself a new iPad. The one with the retina display. I had been meaning to for a while, but was often too busy.
I had used several iPads before, and they've always just felt right. The touch, weight, balance, quality, all combine to generate an excellent experience. I wanted something around the home with reasonable battery life, instant on, and something that doesn't need a magnifying glass or too precise finger location. And the iPad delivers.
The main thing I use it for, a lot, is Sky Go. Generally in catchup mode, rather than live. (It's one of those odd things. Of all the programming that's available, a small fraction is what I want to watch. Invariably there's a multiway conflict, followed by hours or days of total wasteland.)
Generally, I find the Sky Go player to work extremely well. Better than iPlayer, anyway (whether that's the player or the delivery mechanism, though, I'm not quite sure). But then I notice that the latest release of the iPlayer app can download content to the iPad for viewing later, which may come in extremely useful.
I got a little iPod shuffle along with it. It's just great. I had an mp3 player from a brand that I had never heard of, and it wasn't reliable, nor did it have reasonable battery life. The whole thing put me off. But I wanted a little distraction at the gym, so the shuffle was perfect - you don't want to look at it or fiddle with the controls, ever, beyond on and off, and I wanted the smallest and lightest model available. I find myself using it so much now that I could actually do with a larger capacity model to get more tracks in the mix.
The latest toy is a new MacBook Pro. A new company laptop was due, I'm known to be a unix guy, so got offered a choice. My only constraint was that the resolution be adequate. (Seriously, 1366x768 is so 1990s.) So the retina display was called for again.
Frankly, I love it. So the keyboard is different, the trackpad is different, the user interface is different. But I quickly became accustomed to it, especially when things actually work. Like the iPad, though, the user experience is dramatically superior. And that old Windows thing from a mainstream supplier I had before is utter garbage in comparison.
Unfortunately I'm having a bit of trouble persuading the company to go for the dual thunderbolt 27-inch display setup.
So, largely by accident, and certainly without deliberate planning, most of my devices happen to have an Apple logo on.
Then my company mobile phone gave up the ghost. I had a Galaxy SII, and was assuming that I would get an SIII when the renewal came due. However, my old phone simply died a few days before the SIII became available in the UK, and I got an iPhone instead as it was actually available there and then.
The iPhone is OK, I guess. I'm not really a heavy smartphone user, it's handy to have some of the features but I wouldn't say that they're really crucial to me. My own personal phone is many years old now, and is one of those increasingly rare device that's actually useful for making phone calls. Generally, though, I wouldn't say that the iPhone is dramatically better than the Galaxy SII I had before; it's a bit more polished, but that's about all.
When it comes to spending my own cash, I then got myself a new iPad. The one with the retina display. I had been meaning to for a while, but was often too busy.
I had used several iPads before, and they've always just felt right. The touch, weight, balance, quality, all combine to generate an excellent experience. I wanted something around the home with reasonable battery life, instant on, and something that doesn't need a magnifying glass or too precise finger location. And the iPad delivers.
The main thing I use it for, a lot, is Sky Go. Generally in catchup mode, rather than live. (It's one of those odd things. Of all the programming that's available, a small fraction is what I want to watch. Invariably there's a multiway conflict, followed by hours or days of total wasteland.)
Generally, I find the Sky Go player to work extremely well. Better than iPlayer, anyway (whether that's the player or the delivery mechanism, though, I'm not quite sure). But then I notice that the latest release of the iPlayer app can download content to the iPad for viewing later, which may come in extremely useful.
I got a little iPod shuffle along with it. It's just great. I had an mp3 player from a brand that I had never heard of, and it wasn't reliable, nor did it have reasonable battery life. The whole thing put me off. But I wanted a little distraction at the gym, so the shuffle was perfect - you don't want to look at it or fiddle with the controls, ever, beyond on and off, and I wanted the smallest and lightest model available. I find myself using it so much now that I could actually do with a larger capacity model to get more tracks in the mix.
The latest toy is a new MacBook Pro. A new company laptop was due, I'm known to be a unix guy, so got offered a choice. My only constraint was that the resolution be adequate. (Seriously, 1366x768 is so 1990s.) So the retina display was called for again.
Frankly, I love it. So the keyboard is different, the trackpad is different, the user interface is different. But I quickly became accustomed to it, especially when things actually work. Like the iPad, though, the user experience is dramatically superior. And that old Windows thing from a mainstream supplier I had before is utter garbage in comparison.
Unfortunately I'm having a bit of trouble persuading the company to go for the dual thunderbolt 27-inch display setup.
So, largely by accident, and certainly without deliberate planning, most of my devices happen to have an Apple logo on.
Sunday, September 02, 2012
Cargo Cult IT
In a Cargo Cult, practitioners slavishly imitate the superficial behaviours of a more advanced culture in the hope that they will receive the benefits of that more advanced culture.
I'm seeing signs that Cargo Cult behaviour is becoming prevalent in IT. Some examples that come to mind are agile, cloud, and devops.
This isn't to say that these technologies are inherently flawed. Rather, just as in the true Cargo Cults, adherents completely miss the point and hope to reap the benefits of a technology by blindly applying its superficial manifestations in formulaic fashion.
Let's be absolutely clear - many advanced organizations are using agile, cloud, devops, and other technologies to great effect. The problem comes when more primitive societies merely emulate the formalism without any clear understanding of the reasons behind it - or even an acceptance that there are underlying reasons.
Slavishly imitating the behavioural patterns of a more successful organization is unlikely to lead to a successful outcome. Rather, understanding your own organization's problems and then understanding how other organizations have attacked theirs, and why they have adopted the solutions they have, will allow progress.
Of course, there are other cults that are simply false. I'm tempted to drop ITIL and ISO9000 straight into that bucket.
I'm seeing signs that Cargo Cult behaviour is becoming prevalent in IT. Some examples that come to mind are agile, cloud, and devops.
This isn't to say that these technologies are inherently flawed. Rather, just as in the true Cargo Cults, adherents completely miss the point and hope to reap the benefits of a technology by blindly applying its superficial manifestations in formulaic fashion.
Let's be absolutely clear - many advanced organizations are using agile, cloud, devops, and other technologies to great effect. The problem comes when more primitive societies merely emulate the formalism without any clear understanding of the reasons behind it - or even an acceptance that there are underlying reasons.
Slavishly imitating the behavioural patterns of a more successful organization is unlikely to lead to a successful outcome. Rather, understanding your own organization's problems and then understanding how other organizations have attacked theirs, and why they have adopted the solutions they have, will allow progress.
Of course, there are other cults that are simply false. I'm tempted to drop ITIL and ISO9000 straight into that bucket.
Monday, June 04, 2012
JKstat in Javascript
I've just released version 0.70 of JKstat, which brings in a couple of new features that I've had sitting off to the side for a while.
The simplest is an implementation of a RESTful server using Jersey. This is just a handful of annotated classes and an updated build script to create a war file that can be dropped into tomcat. On its own, this isn't terribly interesting - the JKstat client can use the XML-RPC interface just fine, and that's easier to implement.
However, there are a number of client interfaces that are much easier to get working if you're using RESTful interfaces. One is the java applet version of the JKstat browser; another is anything using javascript on the client.
Which leads me to the other new feature here. Spurred on by Mike Harsch's mpstat demo, I've put together a very simple browser based client for JKstat, using javascript.

It's just a prototype, really. But it has the basic interface features you would need. On the left the kstats are arranged in a hierarchy, thanks to jsTree. In the main panel is a continuously updating table of the statistics and their values and rates, and above is a graph of the data implemented using Flot.
The simplest is an implementation of a RESTful server using Jersey. This is just a handful of annotated classes and an updated build script to create a war file that can be dropped into tomcat. On its own, this isn't terribly interesting - the JKstat client can use the XML-RPC interface just fine, and that's easier to implement.
However, there are a number of client interfaces that are much easier to get working if you're using RESTful interfaces. One is the java applet version of the JKstat browser; another is anything using javascript on the client.
Which leads me to the other new feature here. Spurred on by Mike Harsch's mpstat demo, I've put together a very simple browser based client for JKstat, using javascript.
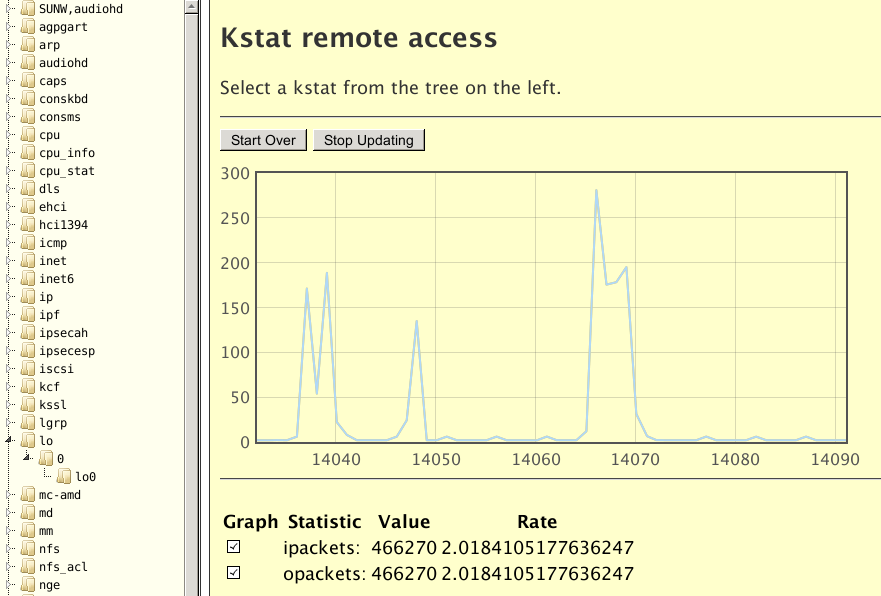
It's just a prototype, really. But it has the basic interface features you would need. On the left the kstats are arranged in a hierarchy, thanks to jsTree. In the main panel is a continuously updating table of the statistics and their values and rates, and above is a graph of the data implemented using Flot.
Sunday, May 27, 2012
Lessons learnt from serving Queen Victoria's Journals
Towards the end of last year I was asked about how easy it would be to launch a very public website. Most of what the company does is relatively highly specialised, low traffic, high value, for a very narrow and targeted audience.
We were essentially unfamiliar with sites that were wide open and potentially interesting to the whole world (or a large fraction thereof). And we knew that there would be widespread media coverage. So there were real concerns that whatever we built would buckle, turning into a PR disaster. (Everyone's heard of the census launch, I expect.)
Almost 6 months later, we launched Queen Victoria's Journals. And yes, it ended up both nationally and locally on the BBC, in the UK newspapers including The Guardian, The Independent and the Daily Mail, and overseas in Canada and India.
After a huge amount of work, the launch went without a hitch. Traffic levels were right where we expected, and the system handled the traffic exactly as predicted. What's also clear is that if we hadn't done all the preparation work, it would most likely have been a disaster.
We're using pretty standard components - Java, Apache, Tomcat, Solr - and as I've explained previously, we maintain our own software stack. This is all hosted on Solaris Zones, built our way - so we can trivially build a bunch more, clone and restore them.
There's no real tuning involved in the standard components. They'll cope just fine, provided you don't do anything spectacularly stupid with the applications or data that you're serving. I built an isolated test setup, cloned regularly from a development build, so that I could run capacity tests without my work being affected by or impacting on regular development.
The site doesn't have that many pages, so I started by simply testing each one - using wget or ab (apache bench). I needed a whole bunch of servers to send the requests from - easy, just build a bunch more zones. And this showed that we could serve hundreds of pages a second from each tomcat, apart from one page which was returning a page every few seconds. The problem page - it's the Illustrations page linked to from the main toolbar - was being created dynamically via multiple queries to the search back-end which were being rendered each time. The content never changes (until we update the product, at any rate) so this is really a static page. Replacing it with something static not only fixed that problem, but dramatically reduced the memory footprint of tomcat, as we were holding search references open in the user session and generating huge numbers of temporary objects each time it was rendered.
The server capacity and performance issues solved, we went back to looking at network utilization. That's harder to solve from an infrastructure point of view - while I can trivially deploy a whole bunch more zones in a minute or so, it takes months to get additional fibre put in the ground. And our initial estimates, which were based on the bandwidth characteristics of some our existing sites, indicated we could well get close to saturating our network.
The truth is, though, that most sites are pretty inefficient, and ours started out as no exception. We got massive wins from compressing html with mod_gzip, we started to minify our javascript, and were able to dramatically decrease the file size of most of the images. (Sane jpeg quality settings are good; not including a 3k colour profile with a 10 byte png icon also helps.) Not only did this decrease our bandwidth requirements by a factor of 5 or more, it also improves responsiveness of the site because users have to download far less.
Most of the testing for bandwidth was really simple - construct a sample test, run it, and count the bytes transferred by looking at the apache logs. Simply replaying the session allows you to see what effect a change has, and you can easily see which requests are most important to address.
We also took the precaution of having some of the site hosted elsewhere, thanks to our good friends at EveryCity. They're using a Solaris derivative so everything's incredibly simple and familiar, making setup a breeze.
We learnt a lot from this exercise, but one of the primary lessons is that building sites that work well isn't hard, it just requires you not to do things that are phenomenally stupid (taking several seconds to dynamically generate a static page) or obviously inefficient (jpeg thumbnails that are hundreds of kilobytes each), that javascript minifies very well, and html (especially the hideously inefficient html I was looking at) compresses down really well.
Test. Identify worst offender. Fix. Repeat. Every time you go round the loop improves your chances of success.
We were essentially unfamiliar with sites that were wide open and potentially interesting to the whole world (or a large fraction thereof). And we knew that there would be widespread media coverage. So there were real concerns that whatever we built would buckle, turning into a PR disaster. (Everyone's heard of the census launch, I expect.)
Almost 6 months later, we launched Queen Victoria's Journals. And yes, it ended up both nationally and locally on the BBC, in the UK newspapers including The Guardian, The Independent and the Daily Mail, and overseas in Canada and India.
After a huge amount of work, the launch went without a hitch. Traffic levels were right where we expected, and the system handled the traffic exactly as predicted. What's also clear is that if we hadn't done all the preparation work, it would most likely have been a disaster.
We're using pretty standard components - Java, Apache, Tomcat, Solr - and as I've explained previously, we maintain our own software stack. This is all hosted on Solaris Zones, built our way - so we can trivially build a bunch more, clone and restore them.
There's no real tuning involved in the standard components. They'll cope just fine, provided you don't do anything spectacularly stupid with the applications or data that you're serving. I built an isolated test setup, cloned regularly from a development build, so that I could run capacity tests without my work being affected by or impacting on regular development.
The site doesn't have that many pages, so I started by simply testing each one - using wget or ab (apache bench). I needed a whole bunch of servers to send the requests from - easy, just build a bunch more zones. And this showed that we could serve hundreds of pages a second from each tomcat, apart from one page which was returning a page every few seconds. The problem page - it's the Illustrations page linked to from the main toolbar - was being created dynamically via multiple queries to the search back-end which were being rendered each time. The content never changes (until we update the product, at any rate) so this is really a static page. Replacing it with something static not only fixed that problem, but dramatically reduced the memory footprint of tomcat, as we were holding search references open in the user session and generating huge numbers of temporary objects each time it was rendered.
The server capacity and performance issues solved, we went back to looking at network utilization. That's harder to solve from an infrastructure point of view - while I can trivially deploy a whole bunch more zones in a minute or so, it takes months to get additional fibre put in the ground. And our initial estimates, which were based on the bandwidth characteristics of some our existing sites, indicated we could well get close to saturating our network.
The truth is, though, that most sites are pretty inefficient, and ours started out as no exception. We got massive wins from compressing html with mod_gzip, we started to minify our javascript, and were able to dramatically decrease the file size of most of the images. (Sane jpeg quality settings are good; not including a 3k colour profile with a 10 byte png icon also helps.) Not only did this decrease our bandwidth requirements by a factor of 5 or more, it also improves responsiveness of the site because users have to download far less.
Most of the testing for bandwidth was really simple - construct a sample test, run it, and count the bytes transferred by looking at the apache logs. Simply replaying the session allows you to see what effect a change has, and you can easily see which requests are most important to address.
We also took the precaution of having some of the site hosted elsewhere, thanks to our good friends at EveryCity. They're using a Solaris derivative so everything's incredibly simple and familiar, making setup a breeze.
We learnt a lot from this exercise, but one of the primary lessons is that building sites that work well isn't hard, it just requires you not to do things that are phenomenally stupid (taking several seconds to dynamically generate a static page) or obviously inefficient (jpeg thumbnails that are hundreds of kilobytes each), that javascript minifies very well, and html (especially the hideously inefficient html I was looking at) compresses down really well.
Test. Identify worst offender. Fix. Repeat. Every time you go round the loop improves your chances of success.
Wednesday, May 23, 2012
Simple Zone Architecture
I use Solaris zones extensively - the assumption is that everything a user or application sees is a zone, everything is run in zones by default.
(System-level infrastructure doesn't, but that's basically NFS and nameservers. Everything else, just build another zone.)
After a lot of experience building and deploying zones, I've settled on what is basically a standard build. For new builds, that is; legacy replacement is a whole different ballgame.
First, start with a sparse-root zone. Apart from being efficient, this makes the OS read-only. Which basically means that there's no mystery meat, the zone is guaranteed to tbe the same as the host, and all zones are identical. Users in the zone can't change the system at all; which means that the OS administrator (me) can reliably assume that the OS is disposable.
Second, define one place for applications to be. It doesn't really matter what that is. Not being likely to conflict with anything else out there is good. Something in /opt is probably a good idea. We used to have this vary, so that different types of application used different names. But now we insist on /opt/company_name and every system looks the same. (That's the theory - some applications get really fussy and insist on being installed in one specific place, but that's actually fairly rare.)
This one location is a separate zfs filesystem loopback mounted from the global zone. Note that it's just mounted, not delegated - all storage management is done in the global zone.
Then, install everything you need in that one place. And we manage our own stack so that we don't have unnecessary dependencies on what comes with the OS, making the OS installation even more disposable.
We actually have a standard layout we use: install the components at the top-level, such as /opt/company_name/apache, which is root-owned and read-only, and then use /opt/company_name/project_name/apache as the server root. Similar trick works for most applications; languages and interpreters go at the top-level and users can't write to them. This is yet another layer of separation, allowing me to upgrade or replace an application or interpreter safely (and roll it back safely as well).
This means that if we want to back up a system, all we need is /opt/company_name and /var/svc/manifest/site to pick up the SMF manifests (and the SSH keys in /etc/ssh if we want to capture the system identity). That's back up. Restore is just unpacking the archive thus created, including the ssh keys; cloning a system you just unpack a backup of the system you want to reproduce. I have a handful of base backups so I can create a server of a given type from a bare zone in a matter of seconds.
(Because the golden location is its own zfs filesystem, you can use zfs send and receive to do the copy. For normal applications it's probably not worth it; for databases it's pretty valuable. A limitation here is that you can't go to an older zfs version.)
It's so simple there's just a couple of scripts - one to build a zone from a template, another to install the application stack (or restore a backup) that you want, with no need for any fancy automation.
(System-level infrastructure doesn't, but that's basically NFS and nameservers. Everything else, just build another zone.)
After a lot of experience building and deploying zones, I've settled on what is basically a standard build. For new builds, that is; legacy replacement is a whole different ballgame.
First, start with a sparse-root zone. Apart from being efficient, this makes the OS read-only. Which basically means that there's no mystery meat, the zone is guaranteed to tbe the same as the host, and all zones are identical. Users in the zone can't change the system at all; which means that the OS administrator (me) can reliably assume that the OS is disposable.
Second, define one place for applications to be. It doesn't really matter what that is. Not being likely to conflict with anything else out there is good. Something in /opt is probably a good idea. We used to have this vary, so that different types of application used different names. But now we insist on /opt/company_name and every system looks the same. (That's the theory - some applications get really fussy and insist on being installed in one specific place, but that's actually fairly rare.)
This one location is a separate zfs filesystem loopback mounted from the global zone. Note that it's just mounted, not delegated - all storage management is done in the global zone.
Then, install everything you need in that one place. And we manage our own stack so that we don't have unnecessary dependencies on what comes with the OS, making the OS installation even more disposable.
We actually have a standard layout we use: install the components at the top-level, such as /opt/company_name/apache, which is root-owned and read-only, and then use /opt/company_name/project_name/apache as the server root. Similar trick works for most applications; languages and interpreters go at the top-level and users can't write to them. This is yet another layer of separation, allowing me to upgrade or replace an application or interpreter safely (and roll it back safely as well).
This means that if we want to back up a system, all we need is /opt/company_name and /var/svc/manifest/site to pick up the SMF manifests (and the SSH keys in /etc/ssh if we want to capture the system identity). That's back up. Restore is just unpacking the archive thus created, including the ssh keys; cloning a system you just unpack a backup of the system you want to reproduce. I have a handful of base backups so I can create a server of a given type from a bare zone in a matter of seconds.
(Because the golden location is its own zfs filesystem, you can use zfs send and receive to do the copy. For normal applications it's probably not worth it; for databases it's pretty valuable. A limitation here is that you can't go to an older zfs version.)
It's so simple there's just a couple of scripts - one to build a zone from a template, another to install the application stack (or restore a backup) that you want, with no need for any fancy automation.
Sunday, May 20, 2012
Vendor Stack vs build your own
Operating System distributions are getting ever more bloated, including more and more packages. While this reduces the need for the end user to build their own software, does it actually eliminate the need for systems administrators to manage the software on their systems?
I would argue that in many cases having software you rely on as part of the operating system is actually a hindrance rather than a help.
For example, much of my work involves building web servers. These include Java, Apache, Tomcat, MySQL and the like. And, when we deploy systems, we explicitly use our own private copies of each component in the stack.
This is a deliberate choice. And there are several reasons behind it.
For one, it ensures that we have exactly the build time options and, (in the case of apache) the modules we need. Often we require slightly different choices than the defaults.
Keeping everything separate insulates us from vendor changes - we're completely unaffected by a vendor applying a harmful patch, or from "upgrading" to a newer version of the components.
A corollary to this is that we can patch and update the OS on our servers with much more freedom, as we don't have to worry about the effect on our application stack at all. It goes the other way - we can update the components in our stack without having to touch the OS.
It also means that we can move applications between systems with different patch levels, able to go to both newer and older systems easily - and indeed, between different operating systems and chip architectures.
As we use Solaris zones extensively, this also allows us to have different zones with the components at different revision levels.
With all this, we simply don't need a vendor to supply the various components of the stack. If the OS needs them for something else then fine, we just don't want to get involved. In some cases (databases are the prime example) we go to some effort to make sure they don't get installed at all, because some poor user using the wrong version is likely to get hurt.
All this makes me wonder why operating system vendors bother with maintaining central copies of software that are no use to us. Indeed, many application stacks on unix systems come with their own private copies of the components they need, for exactly the reasons I outlined above. (I've lost count of the number of times something from Sun installed it's own private copy of Java.)
(While the above considers one particular aspect of servers, it's equally true of desktops. Perhaps even more so, as many operating system releases are primarily defined by how incompatible their user interface is to previous releases.)
I would argue that in many cases having software you rely on as part of the operating system is actually a hindrance rather than a help.
For example, much of my work involves building web servers. These include Java, Apache, Tomcat, MySQL and the like. And, when we deploy systems, we explicitly use our own private copies of each component in the stack.
This is a deliberate choice. And there are several reasons behind it.
For one, it ensures that we have exactly the build time options and, (in the case of apache) the modules we need. Often we require slightly different choices than the defaults.
Keeping everything separate insulates us from vendor changes - we're completely unaffected by a vendor applying a harmful patch, or from "upgrading" to a newer version of the components.
A corollary to this is that we can patch and update the OS on our servers with much more freedom, as we don't have to worry about the effect on our application stack at all. It goes the other way - we can update the components in our stack without having to touch the OS.
It also means that we can move applications between systems with different patch levels, able to go to both newer and older systems easily - and indeed, between different operating systems and chip architectures.
As we use Solaris zones extensively, this also allows us to have different zones with the components at different revision levels.
With all this, we simply don't need a vendor to supply the various components of the stack. If the OS needs them for something else then fine, we just don't want to get involved. In some cases (databases are the prime example) we go to some effort to make sure they don't get installed at all, because some poor user using the wrong version is likely to get hurt.
All this makes me wonder why operating system vendors bother with maintaining central copies of software that are no use to us. Indeed, many application stacks on unix systems come with their own private copies of the components they need, for exactly the reasons I outlined above. (I've lost count of the number of times something from Sun installed it's own private copy of Java.)
(While the above considers one particular aspect of servers, it's equally true of desktops. Perhaps even more so, as many operating system releases are primarily defined by how incompatible their user interface is to previous releases.)
Saturday, March 17, 2012
Does anybody still use Java applets?
It's been an awful long time since I thought about Java applets.
A while ago I updated a Java jigsaw application, Sphaero 2, and it was just a regular desktop application. Recently I got asked if it was possible to use it in a web page - as an applet.
This turned out to be incredibly easy. In parallel with the main application (which is a JFrame), implement the same code as part of a JApplet. Took me a few minutes to do (and a bit longer to clean it up and refactor it), so if you go to the Sphaero 2 page there are now a number of sample images that will launch a Java applet if you've got Java support in your browser.
Encouraged by this, I added applet support to JKstat. The idea is to set up a JKstat server, and if you point a web browser directly at the server then you get a page containing the JKstat applet, which can then connect back to the server it was downloaded from (the applet security model says that you can connect back to where you came from, so that's OK) to gather statistics.
This proved to be a little harder. It looks like this only works (in the case of an unsigned applet) for the REST variant of the client-server protocol. If I try it with XML-RPC then it looks like it wants to get DTDs for validation, and gets security exceptions trying to get them. So the standalone JKstat server doesn't work as is.
But that's not too bad, because I've got several options for serving the data using the REST protocol. From my sample play server, to node-kstat, or I've been testing a RESTful server based on Jersey.
It's been a useful learning exercise, and I actually find the results to be quite useful. Maybe applets will become fashionable again?
A while ago I updated a Java jigsaw application, Sphaero 2, and it was just a regular desktop application. Recently I got asked if it was possible to use it in a web page - as an applet.
This turned out to be incredibly easy. In parallel with the main application (which is a JFrame), implement the same code as part of a JApplet. Took me a few minutes to do (and a bit longer to clean it up and refactor it), so if you go to the Sphaero 2 page there are now a number of sample images that will launch a Java applet if you've got Java support in your browser.
Encouraged by this, I added applet support to JKstat. The idea is to set up a JKstat server, and if you point a web browser directly at the server then you get a page containing the JKstat applet, which can then connect back to the server it was downloaded from (the applet security model says that you can connect back to where you came from, so that's OK) to gather statistics.
This proved to be a little harder. It looks like this only works (in the case of an unsigned applet) for the REST variant of the client-server protocol. If I try it with XML-RPC then it looks like it wants to get DTDs for validation, and gets security exceptions trying to get them. So the standalone JKstat server doesn't work as is.
But that's not too bad, because I've got several options for serving the data using the REST protocol. From my sample play server, to node-kstat, or I've been testing a RESTful server based on Jersey.
It's been a useful learning exercise, and I actually find the results to be quite useful. Maybe applets will become fashionable again?
Subscribe to:
Posts (Atom)